Final step into building our simple blog application with the Themosis framework. In order to follow along in this last article, make sure to have fully completed the steps in part 1, part 2 and part 3 of this “Getting started” tutorial.
This fourth installment will introduce you to controller classes and how to leverage the new CLI tool in order to scaffold your files. Watch the video or/and read the tutorial below.
Video
Tutorial
Use a controller
As a first step to improve our code, we’re going to refactor the home route to use a controller class instead of an anonymous function. This improves code readibility and management as we can split the logic into individual pieces instead of writing everything in a single file.
A controller is nothing more than a PHP class where you orchestrate the logic based on a request end-point. For example, you can fetch data from a storage (database, …), call an third-party service, and then prepare your data for output and finally returning a view to the browser.
Now open your Terminal or Console and connect to your virtual machine using Vagrant like so:
vagrant sshThen change directory to your application root:
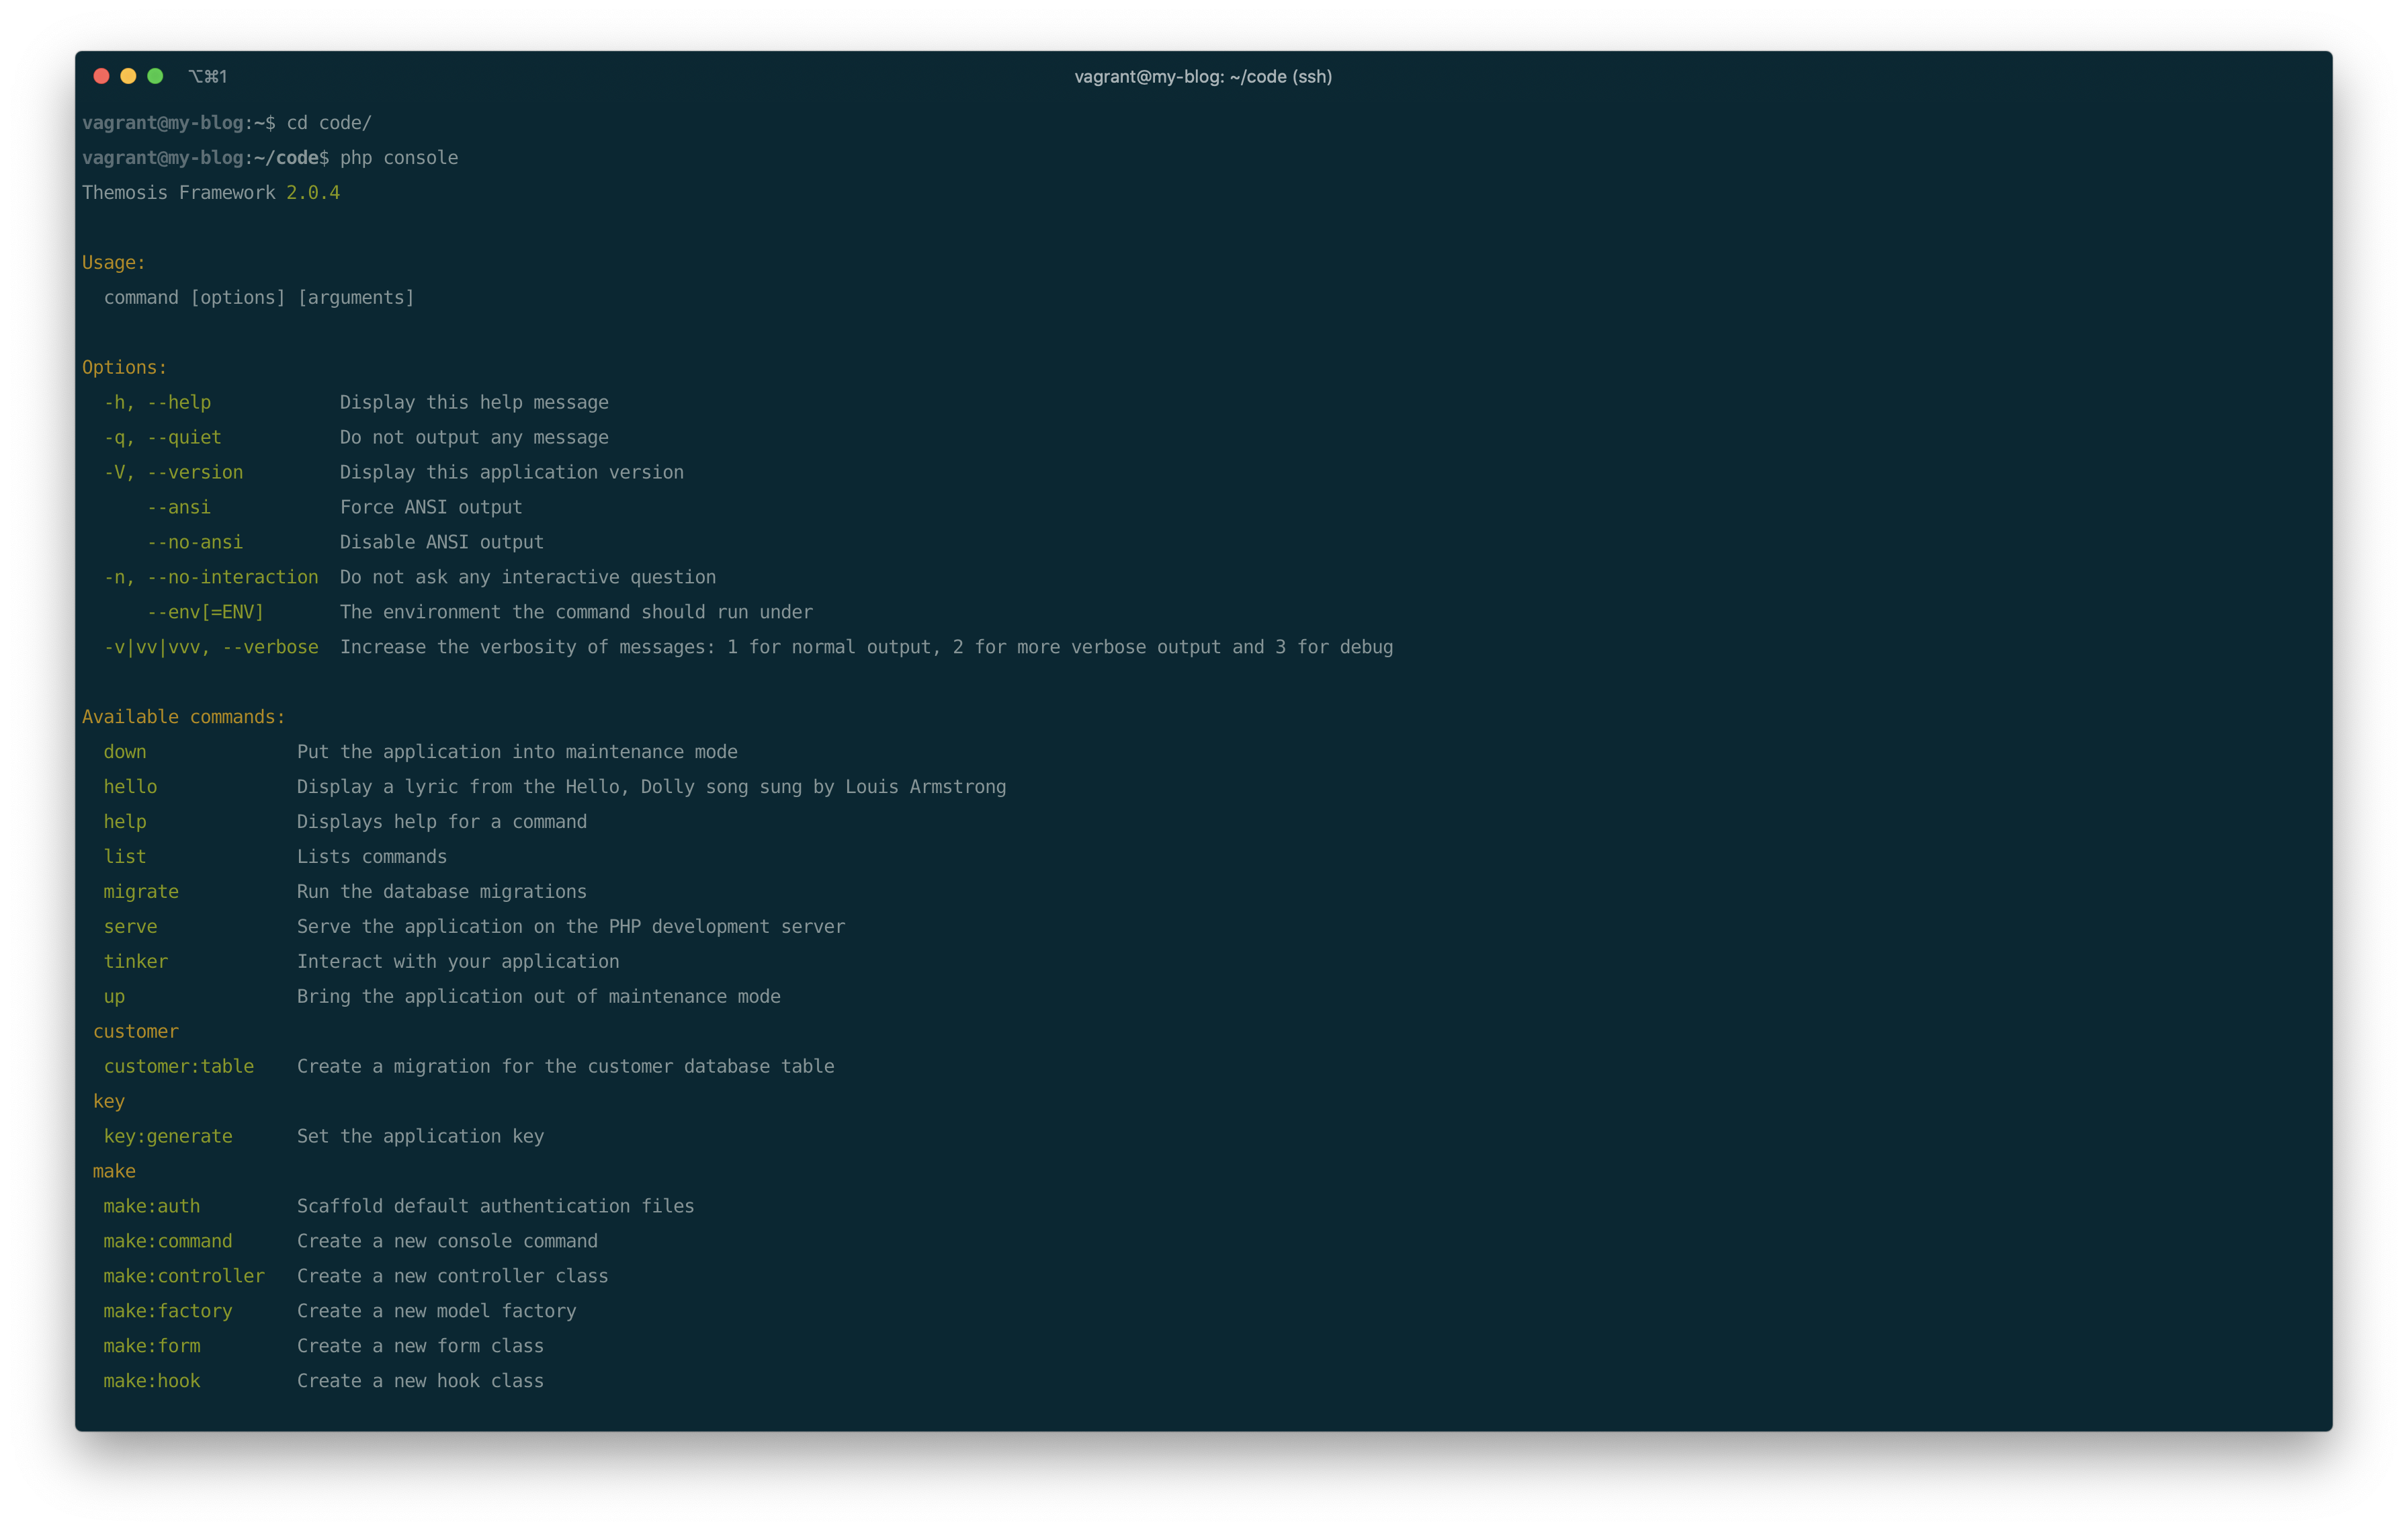
cd codeSince release 2.0, the Themosis framework is bundled with a CLI tool. By calling the CLI tool without any arguments, you should get a list of all its available commands. Run the following command into your Terminal or Console:
php consoleNormally, you should get something like in the screenshot below. The command we are interested into here is the make method and more specifically, it is the make:controller command.
Now, run the make:controller command and pass it the name of your controller class as the first argument, here we’re going to call our class the HomeController:
php console make:controller HomeControllerThe make:controller command generates a new file called HomeController.php and stores it into your app/Http/Controllers directory. Open the file into your code editor.
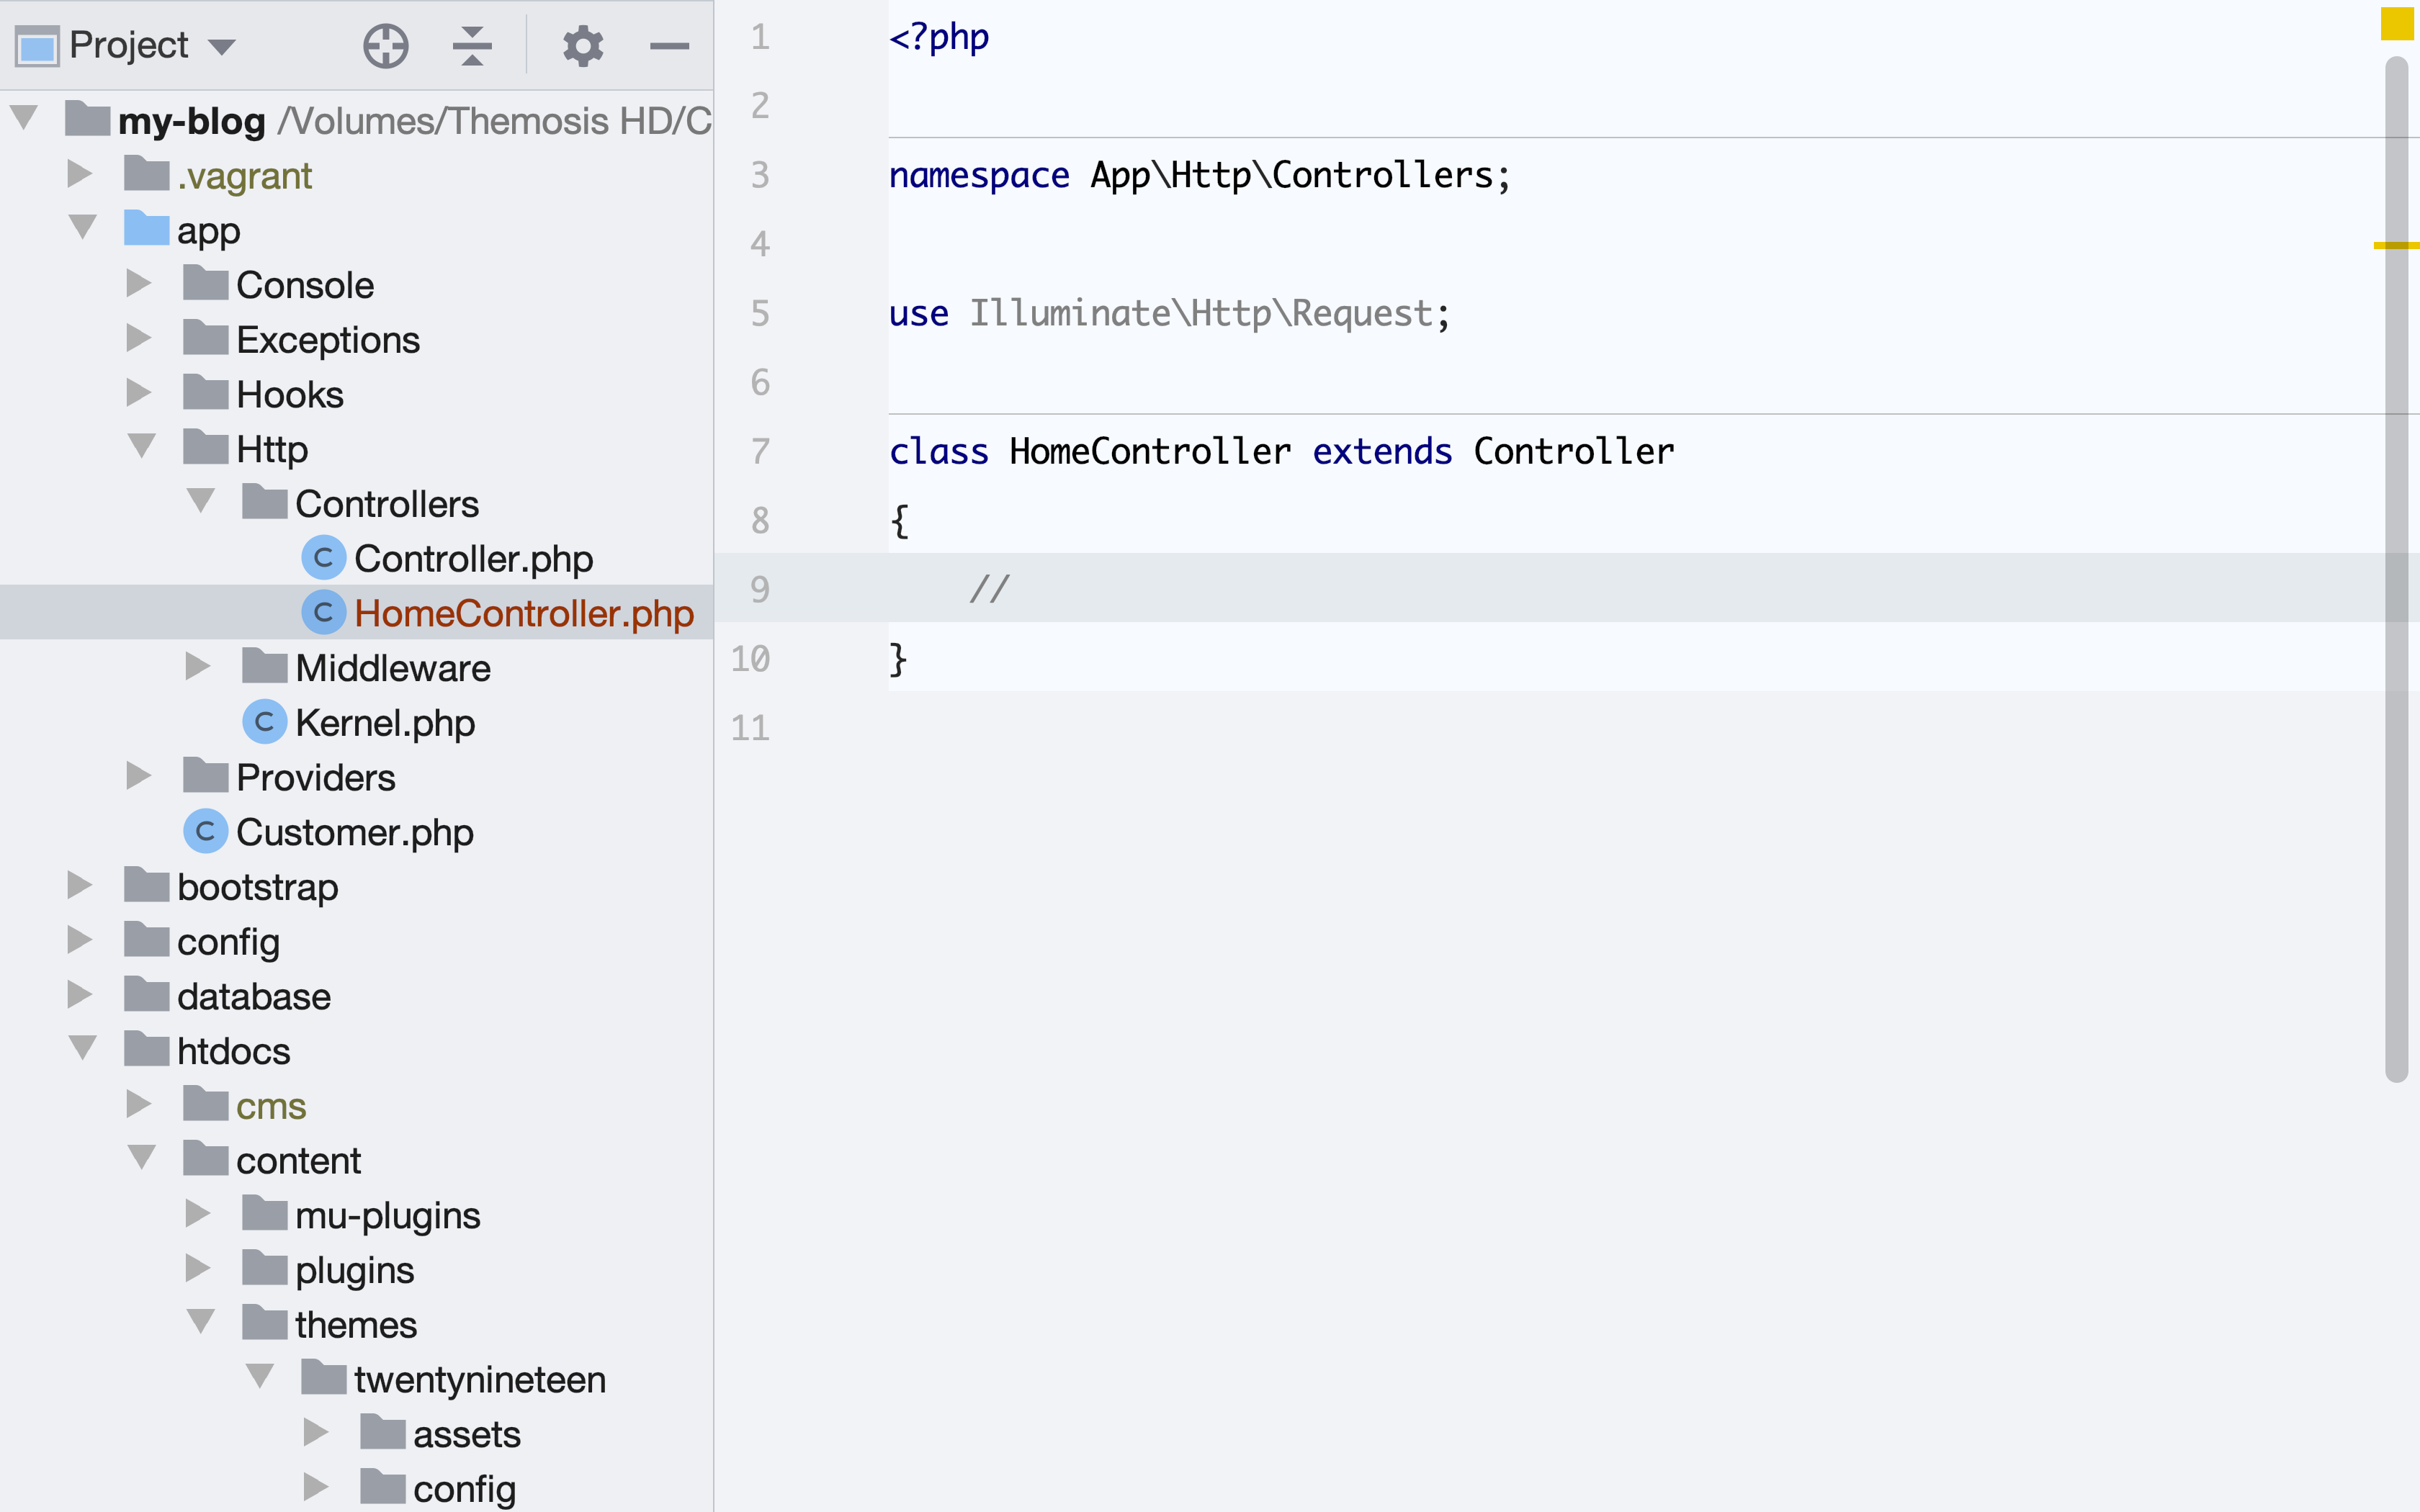
Let’s define a new public method into the HomeController class that is going to handle our home route request. Add the following code:
public function index()
{
    return view('blog.default');
}
Only “public” methods can respond to requests. In this code snippet, we are simply returning a view called blog.default (replacing the blog.archive view). Now, how do we connect our home route to use our controller index method?
Open the routes/web.php file in order to edit our default home route. Replace the anonymous function passed to our home route and call our controller like so:
Route::any('home', 'HomeController@index');The syntax use the @ character. On the left we specify the class name (not its full name) and on the right the method name. If you switch to your browser and visit the home page (refresh), you should have the following image on screen.
This now completes our home route. Each time an end-user requests the home page, it runs through the home route, here defined using a WordPress route. Then the route passes the request to our HomeController PHP class which handles very basic logic and returns the HTML or output through a view file.
Next, we’re going to define all the necessary routes in order to navigate our blog application.
Single post route
If we click on the “Hello world!” article on the home page, we get a 404 Not found page.
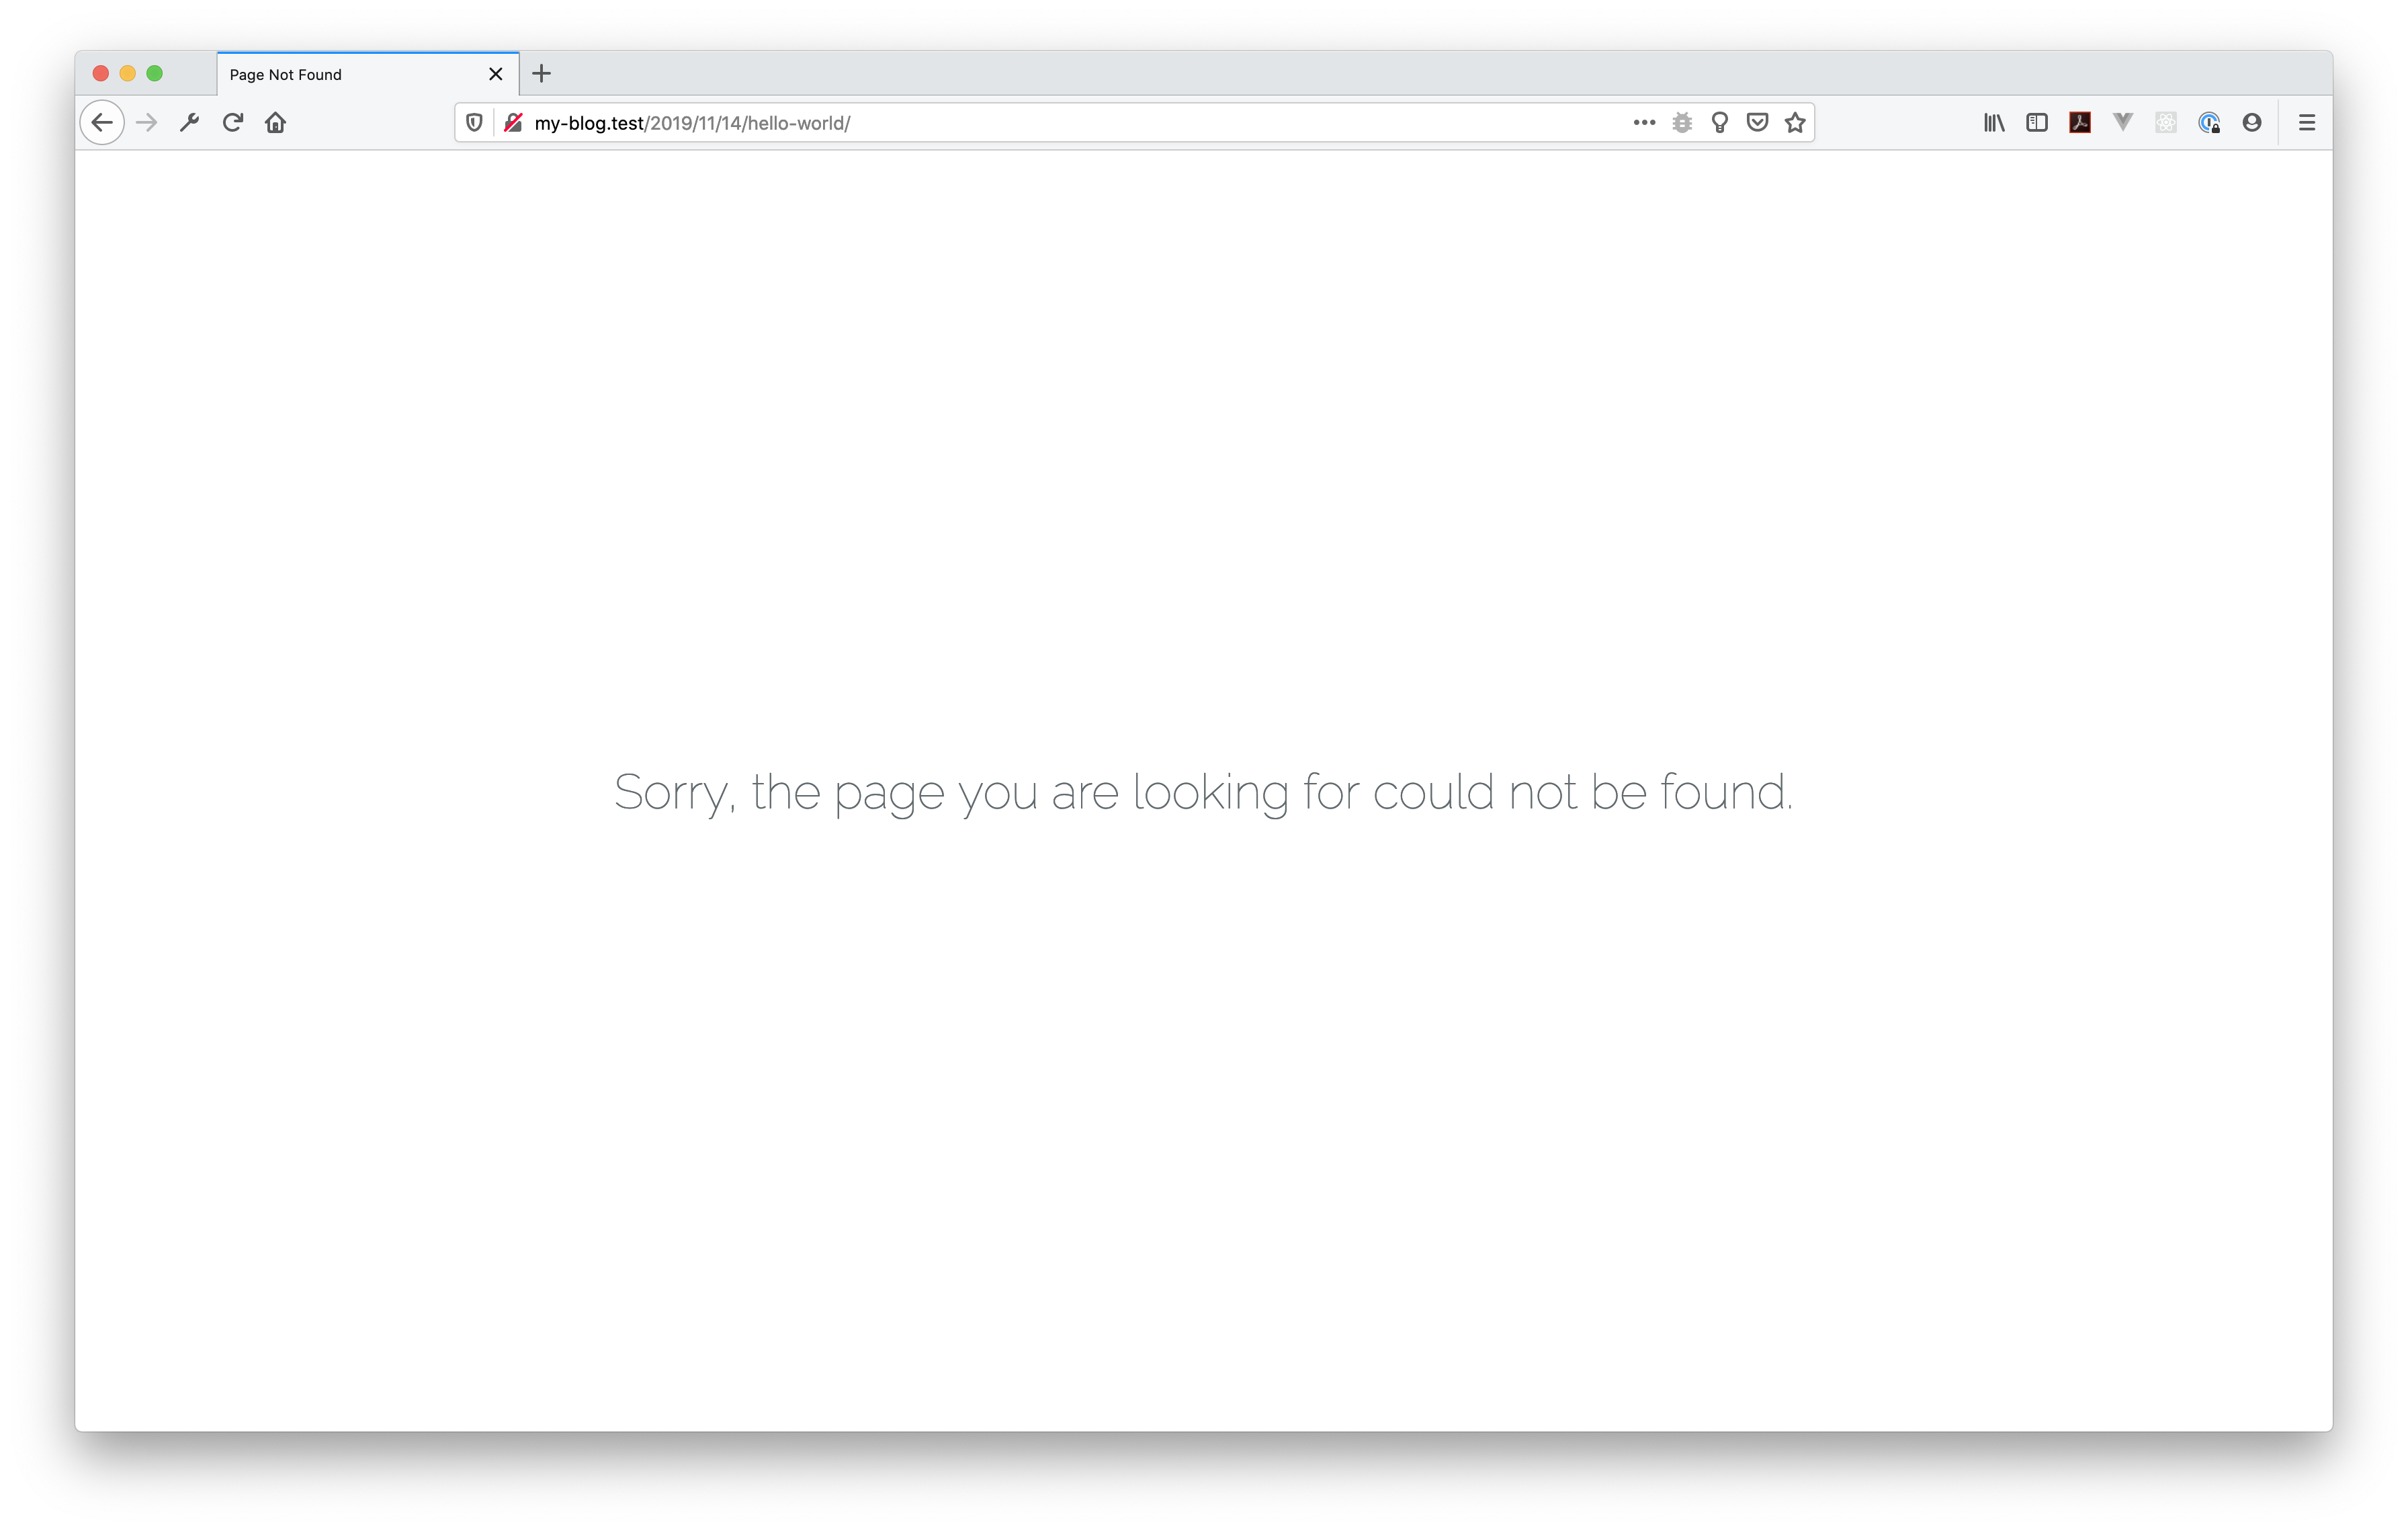
This is the default framework 404 page. Note that this screen is rendered from the core package and can be overwritten or you can simply provide your own 404 view file as we’ll see later on.
We’re missing a route that listens on requests made to a single blog post. Let’s fix this! Open your routes/web.php file and add the following WordPress route:
Route::any('single', 'PostController@index');The PostController does not yet exist, so let’s create it using the CLI make:controller command. Open your Terminal or Console and run the following command:
php console make:controller PostControllerJust like with our home controller, the make:controller command generates a new file called PostController.php into your app/Http/Controllers directory. Open the file and insert the index method like so:
<?php
namespace App\Http\Controllers;
use Illuminate\Http\Request;
class PostController extends Controller
{
public function index()
{
return view('blog.single');
}
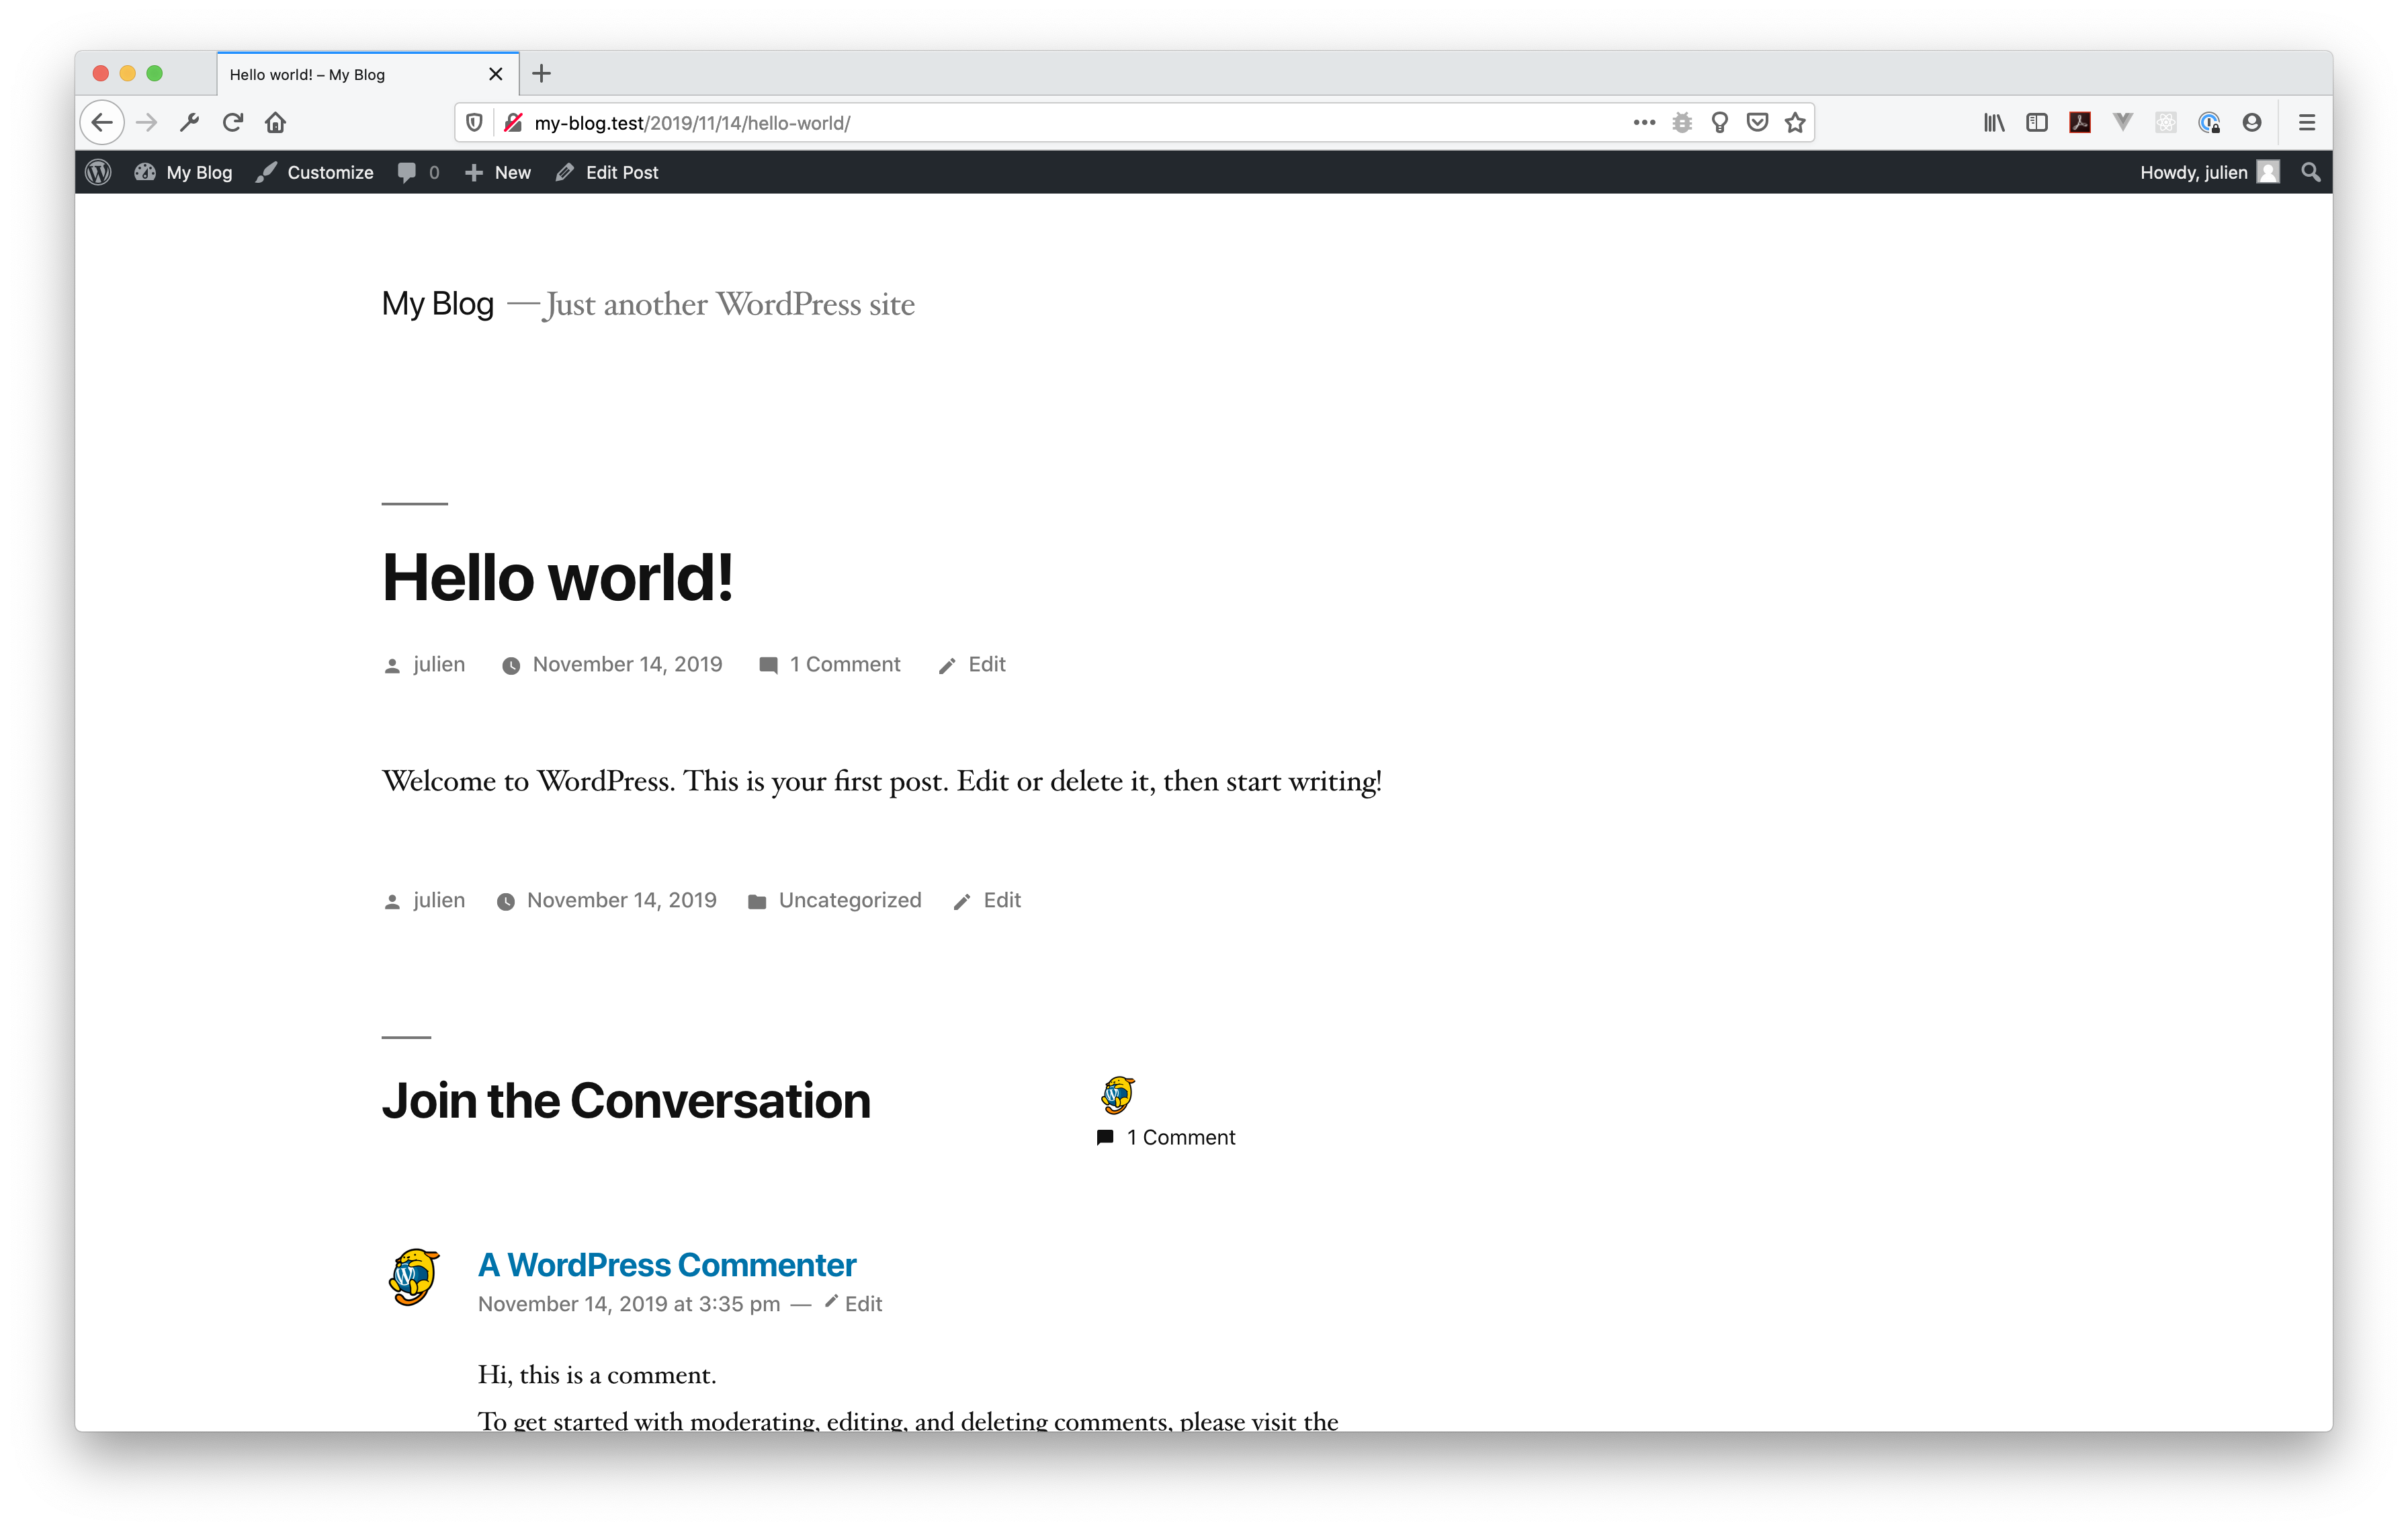
}The index public method returns the blog.single view stored inside your theme views/blog folder. If you switch back to the browser and refresh the “Hello world!” post, you should now get the following output on screen:
Next, let’s tackle the category and date archive routes!
Archive route
If we follow the WordPress template hierarchy like below, you can see that in order to handle requests made to a single category term or a date archive, we can use the WordPress archive “template”.
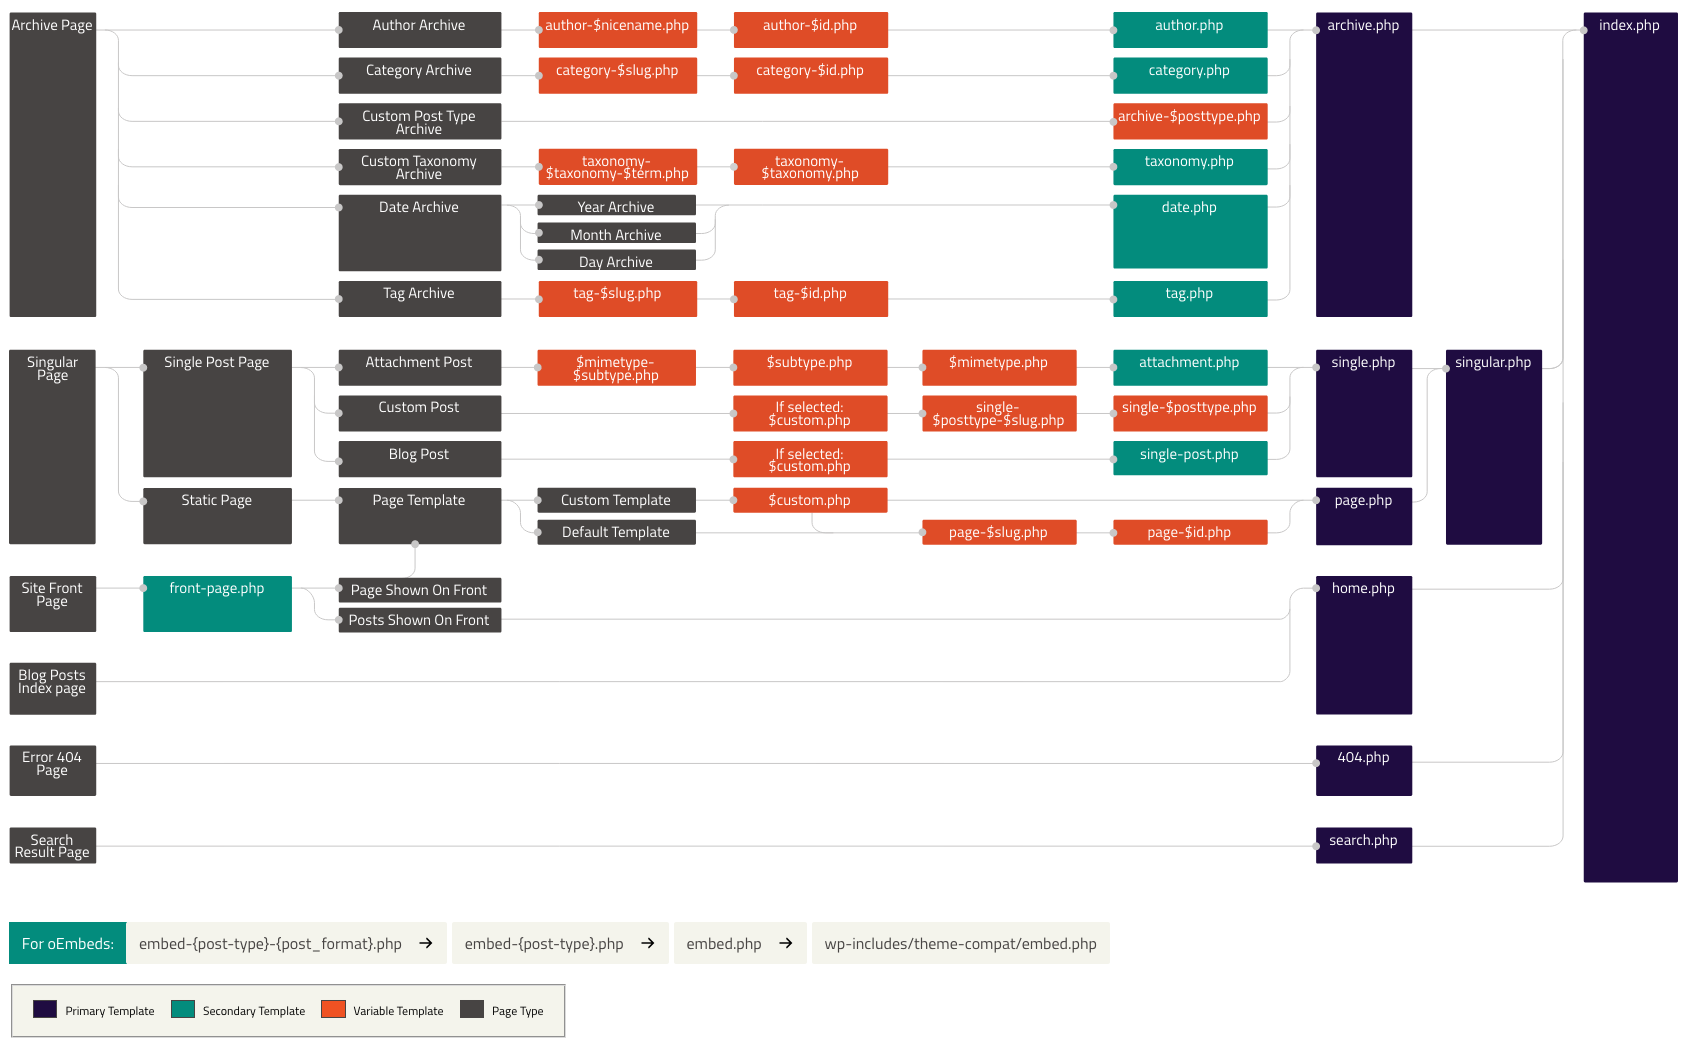
Behind the scene, WordPress is finding this request by calling the is_archive template function. And inside our Themosis framework blog application, this template function is by default associated to the archive condition keyword. So let’s use this archive condition!
Open the routes/web.php file and add the archive route like so:
Route::any('archive', 'ArchiveController@index');Next, generate the ArchiveController class using the CLI:
php console make:controller ArchiveControllerOpen the ArchiveController.php file in your code editor and define the index public method like so:
<?php
namespace App\Http\Controllers;
use Illuminate\Http\Request;
class ArchiveController extends Controller
{
public function index()
{
return view('blog.archive');
}
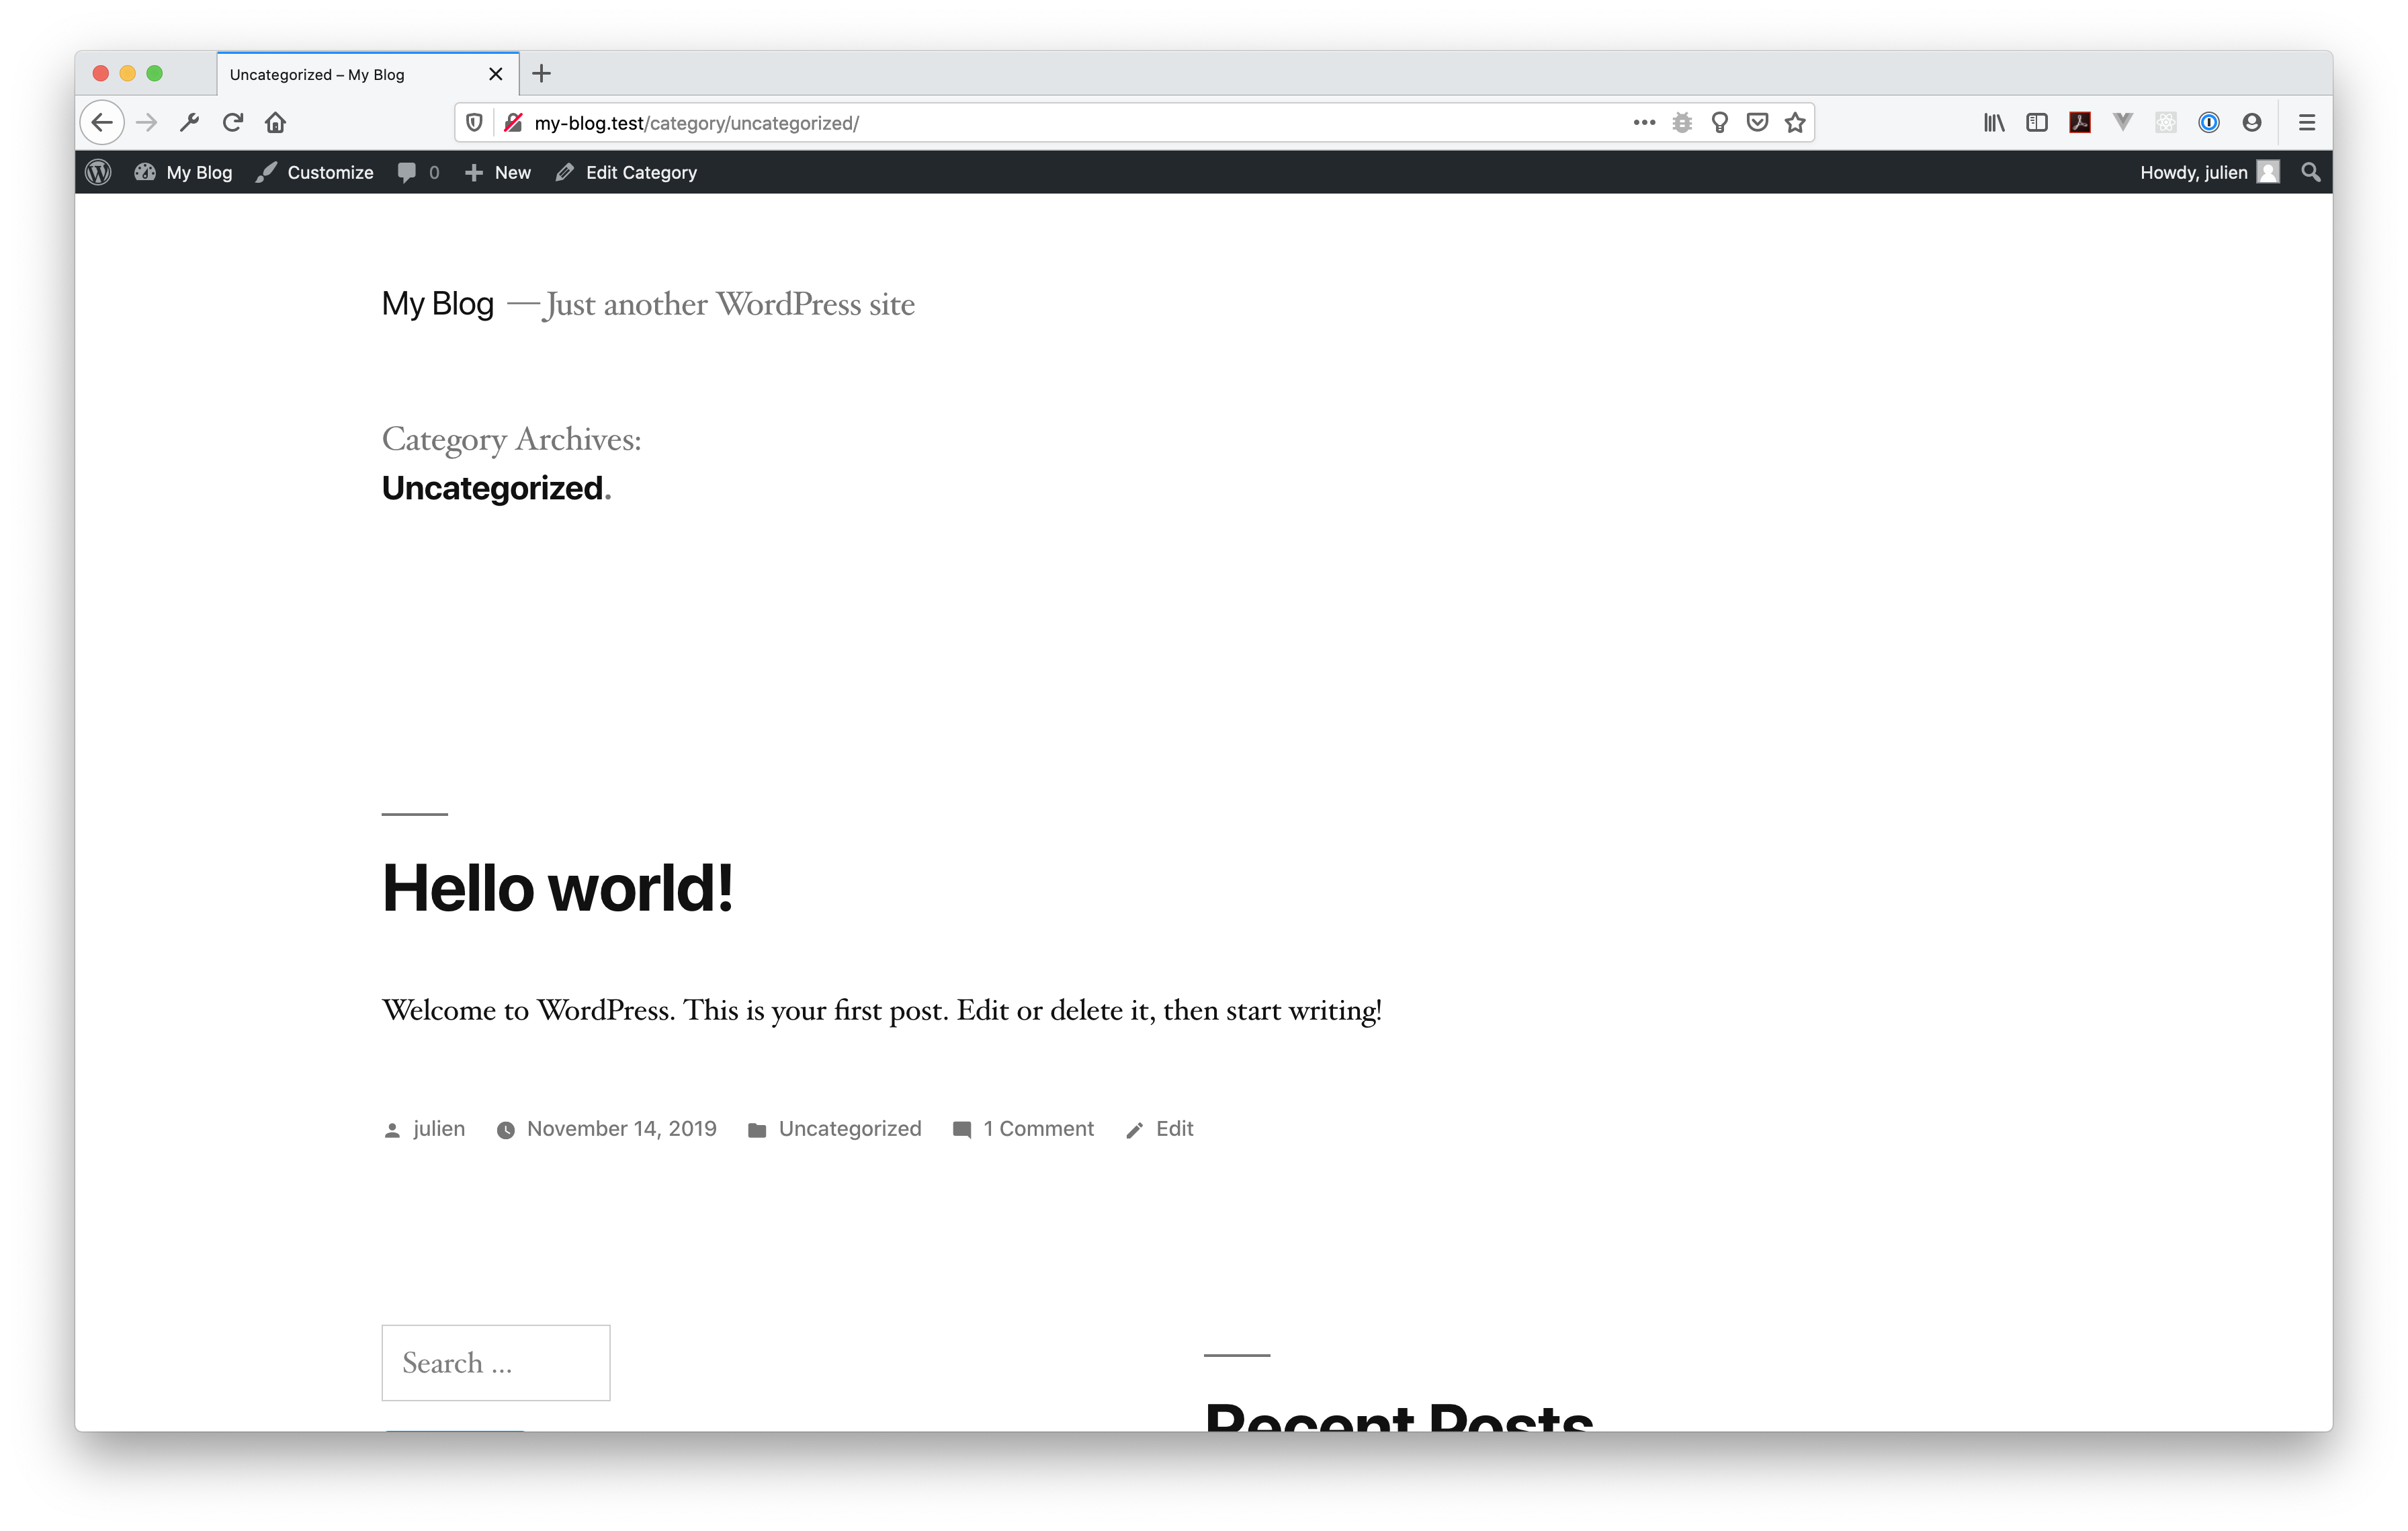
}From the browser, try to visit the default “uncategorized” category or the date archive link displayed on the home page footer (add the archive widget if necessary). Normally you should have the following output:
If you still get a 404 Page not found, simply flush the WordPress permalinks.

Now, let’s define the route that listens on requests made to a WordPress page.
Page route
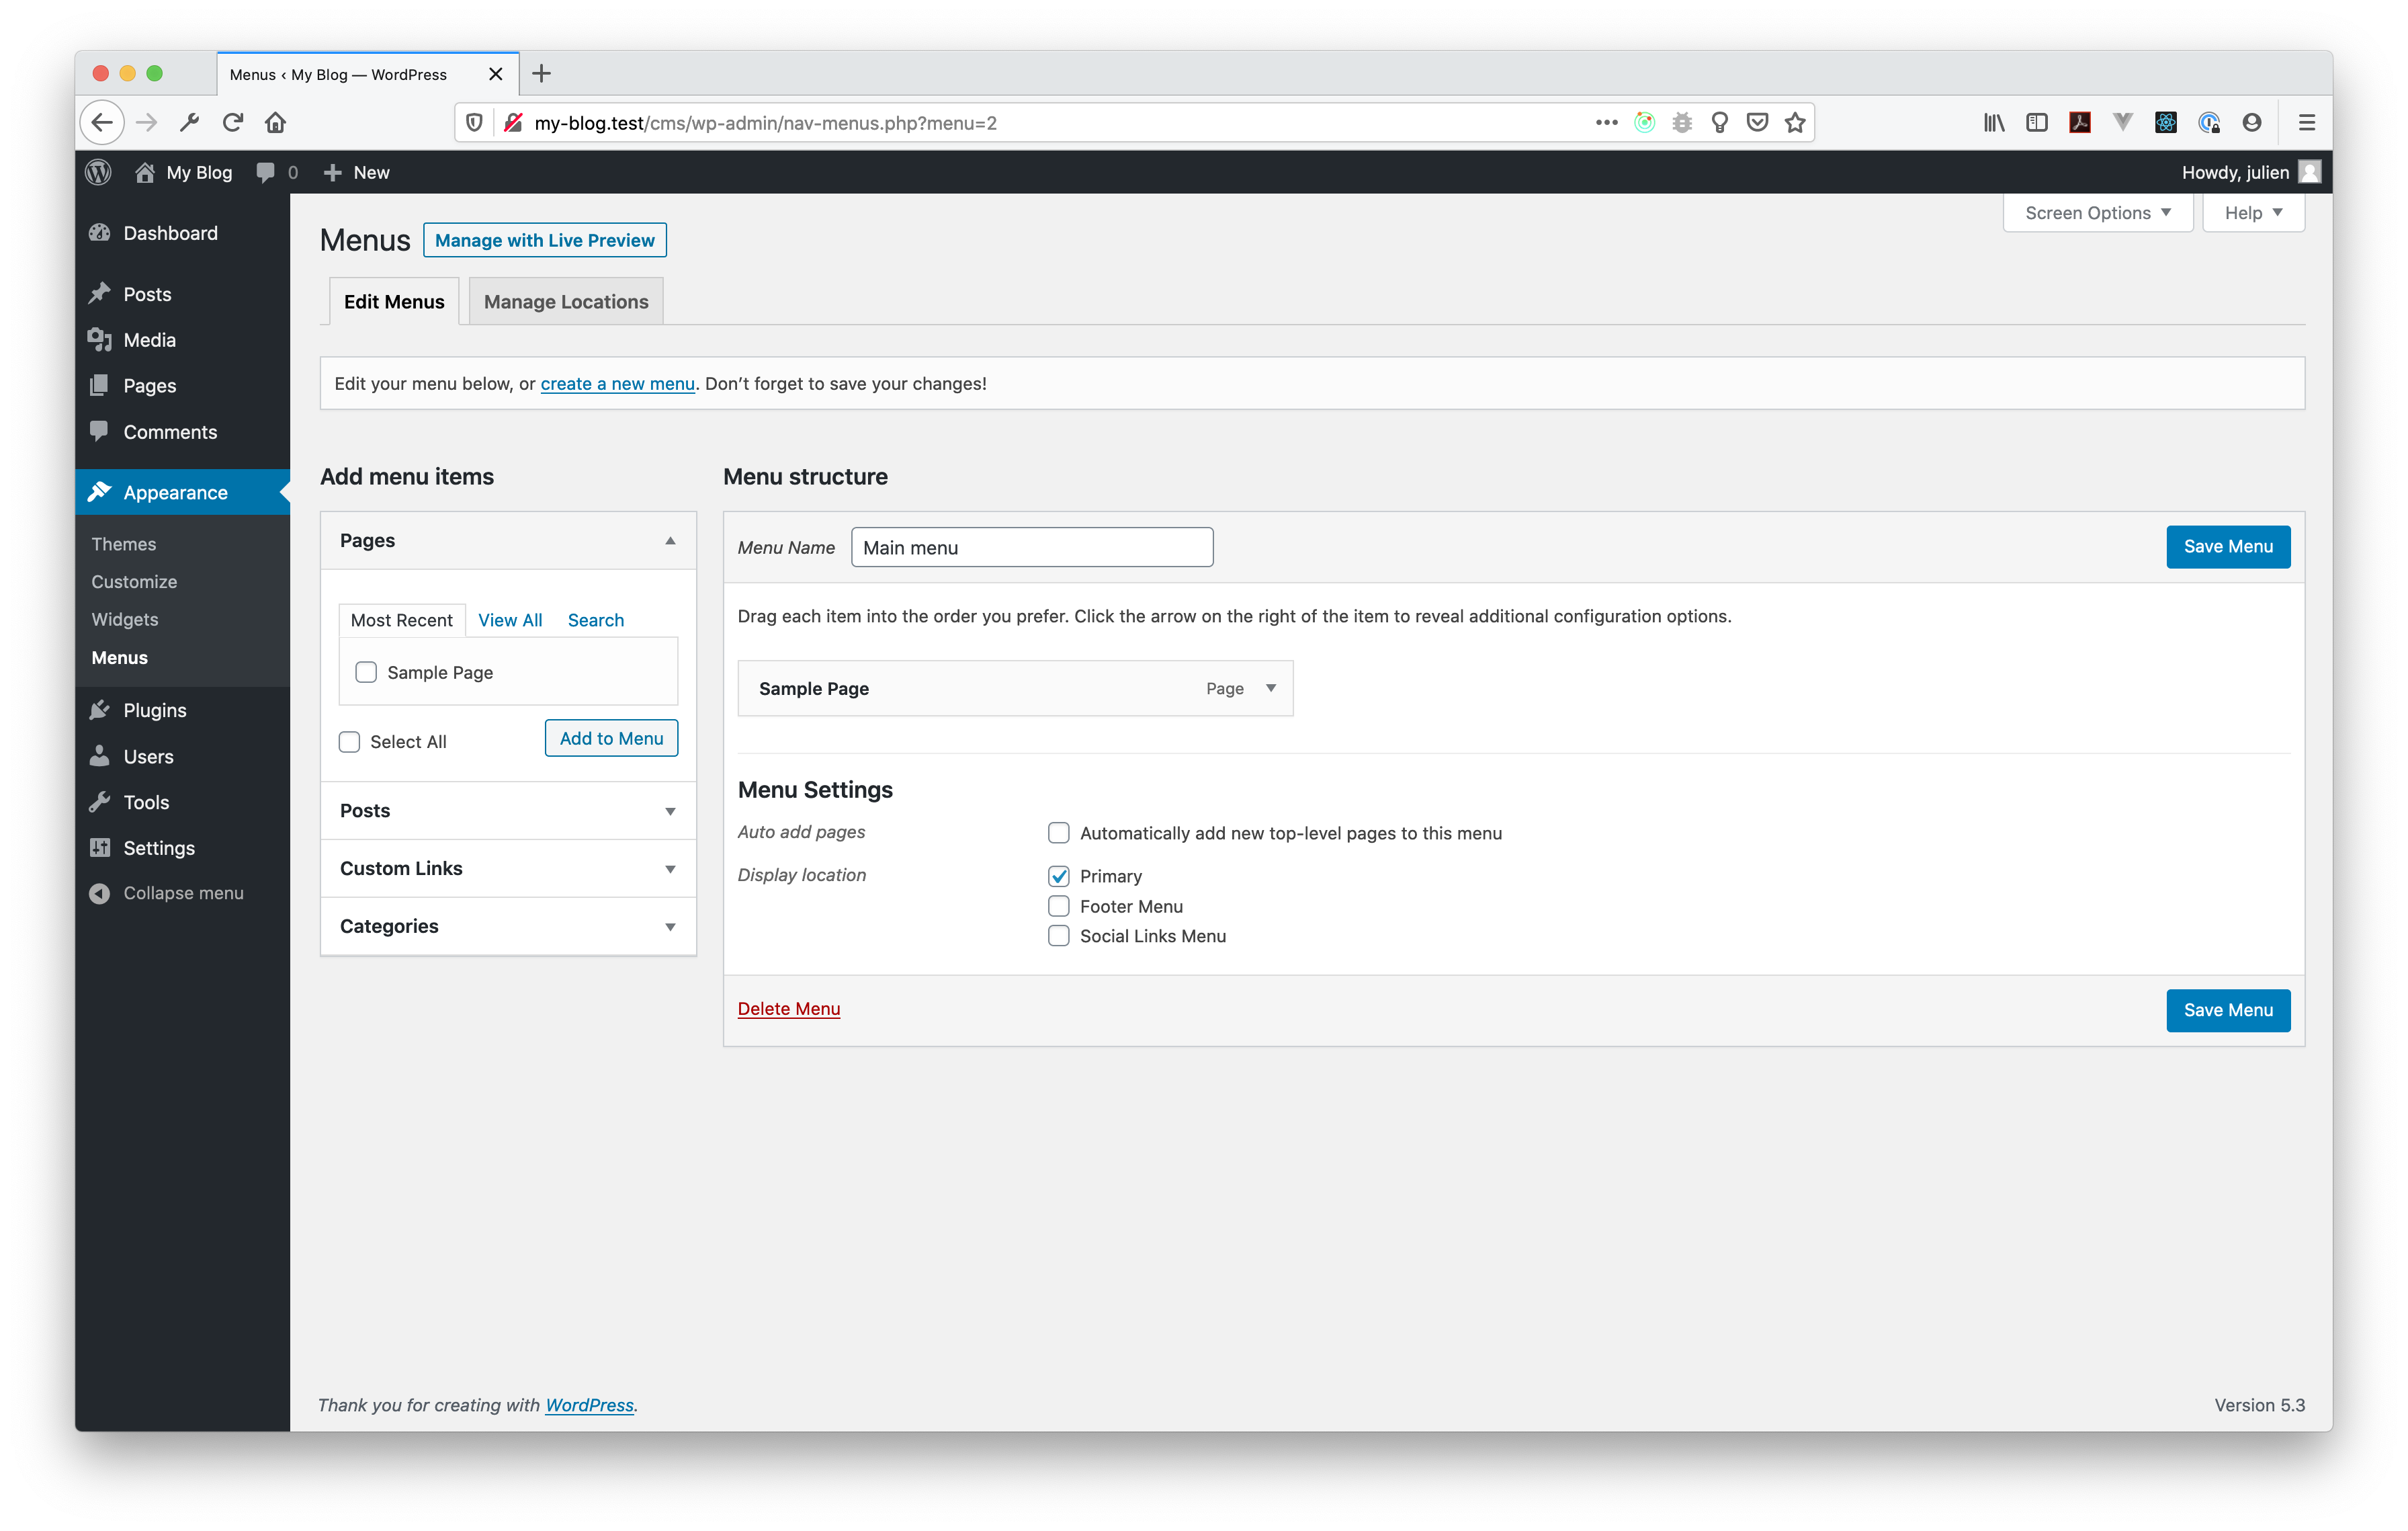
Before setting up our page route. We first need to have a link to one WordPress page. At installation, WordPress is always adding a “Sample page” as an example. First, let’s add a menu with a link to this sample page.
Visit the WordPress administration from your browser and then go to “Appearance -> Menus”. Then create your first menu. Here we’re calling it “Main menu”, and attach the “Sample page” menu item to it. Next, under the “Menu Settings” section, apply the “Primary” display location and save your menu.
Quick note about the menus and how to handle them within a Themosis framework theme. Just like at your application root, a theme and even a plugin, contain a config directory. If you open your theme config directory, you should a list of configuration files. The one we are interested into here is the menus.php file and should have the following code attached to it:
<?php

/**
 * Edit this file in order to add WordPress menus locations.
 * The key is the menu location slug and its value is its description.
 *
 * @see https://developer.wordpress.org/reference/functions/register_nav_menus/
 */
return [
    'menu-1' => __('Primary', THEME_TD),
    'footer' => __('Footer Menu', THEME_TD),
    'social' => __('Social Links Menu', THEME_TD)
];
A configuration file is just an array of key/value pairs. Within this menus.php file, you can register your theme menu locations. The key is the menu slug and the value is its displayed title. Note the use of the THEME_TD constant here. This constant is defined for you automatically and should be used if you need to provide theme translations.
Back to our sample page, visit the home page of your blog and then click on the “Sample Page” link to view its content. You should get a 404 page not found. Let’s now define the WordPress route! Open your routes/web.php file and add the following route between your “single” and “archive” routes:
Route::any('page', 'PageController@index');Routes are read top to bottom inside your file. And if the framework finds a match for the current request, it takes the first route that works. Generally it is recommanded to define routes in this order:
- Classic routes
- WordPress routes
- Single WordPress routes
- Archives/generic WordPress routes
So based on this order, your routes/web.php file should look like this:
<?php

/**
 * Application routes.
 */
Route::any('home', 'HomeController@index');

Route::any('single', 'PostController@index');

Route::any('page', 'PageController@index');

Route::any('archive', 'ArchiveController@index');
Next, open your Terminal or Console and generate the PageController class using the CLI tool:
php console make:controller PageControllerOpen the PageController.php file and define the public index function in order to return the pages.default view stored inside our theme:
<?php
namespace App\Http\Controllers;
use Illuminate\Http\Request;
class PageController extends Controller
{
public function index()
{
return view('pages.default');
}
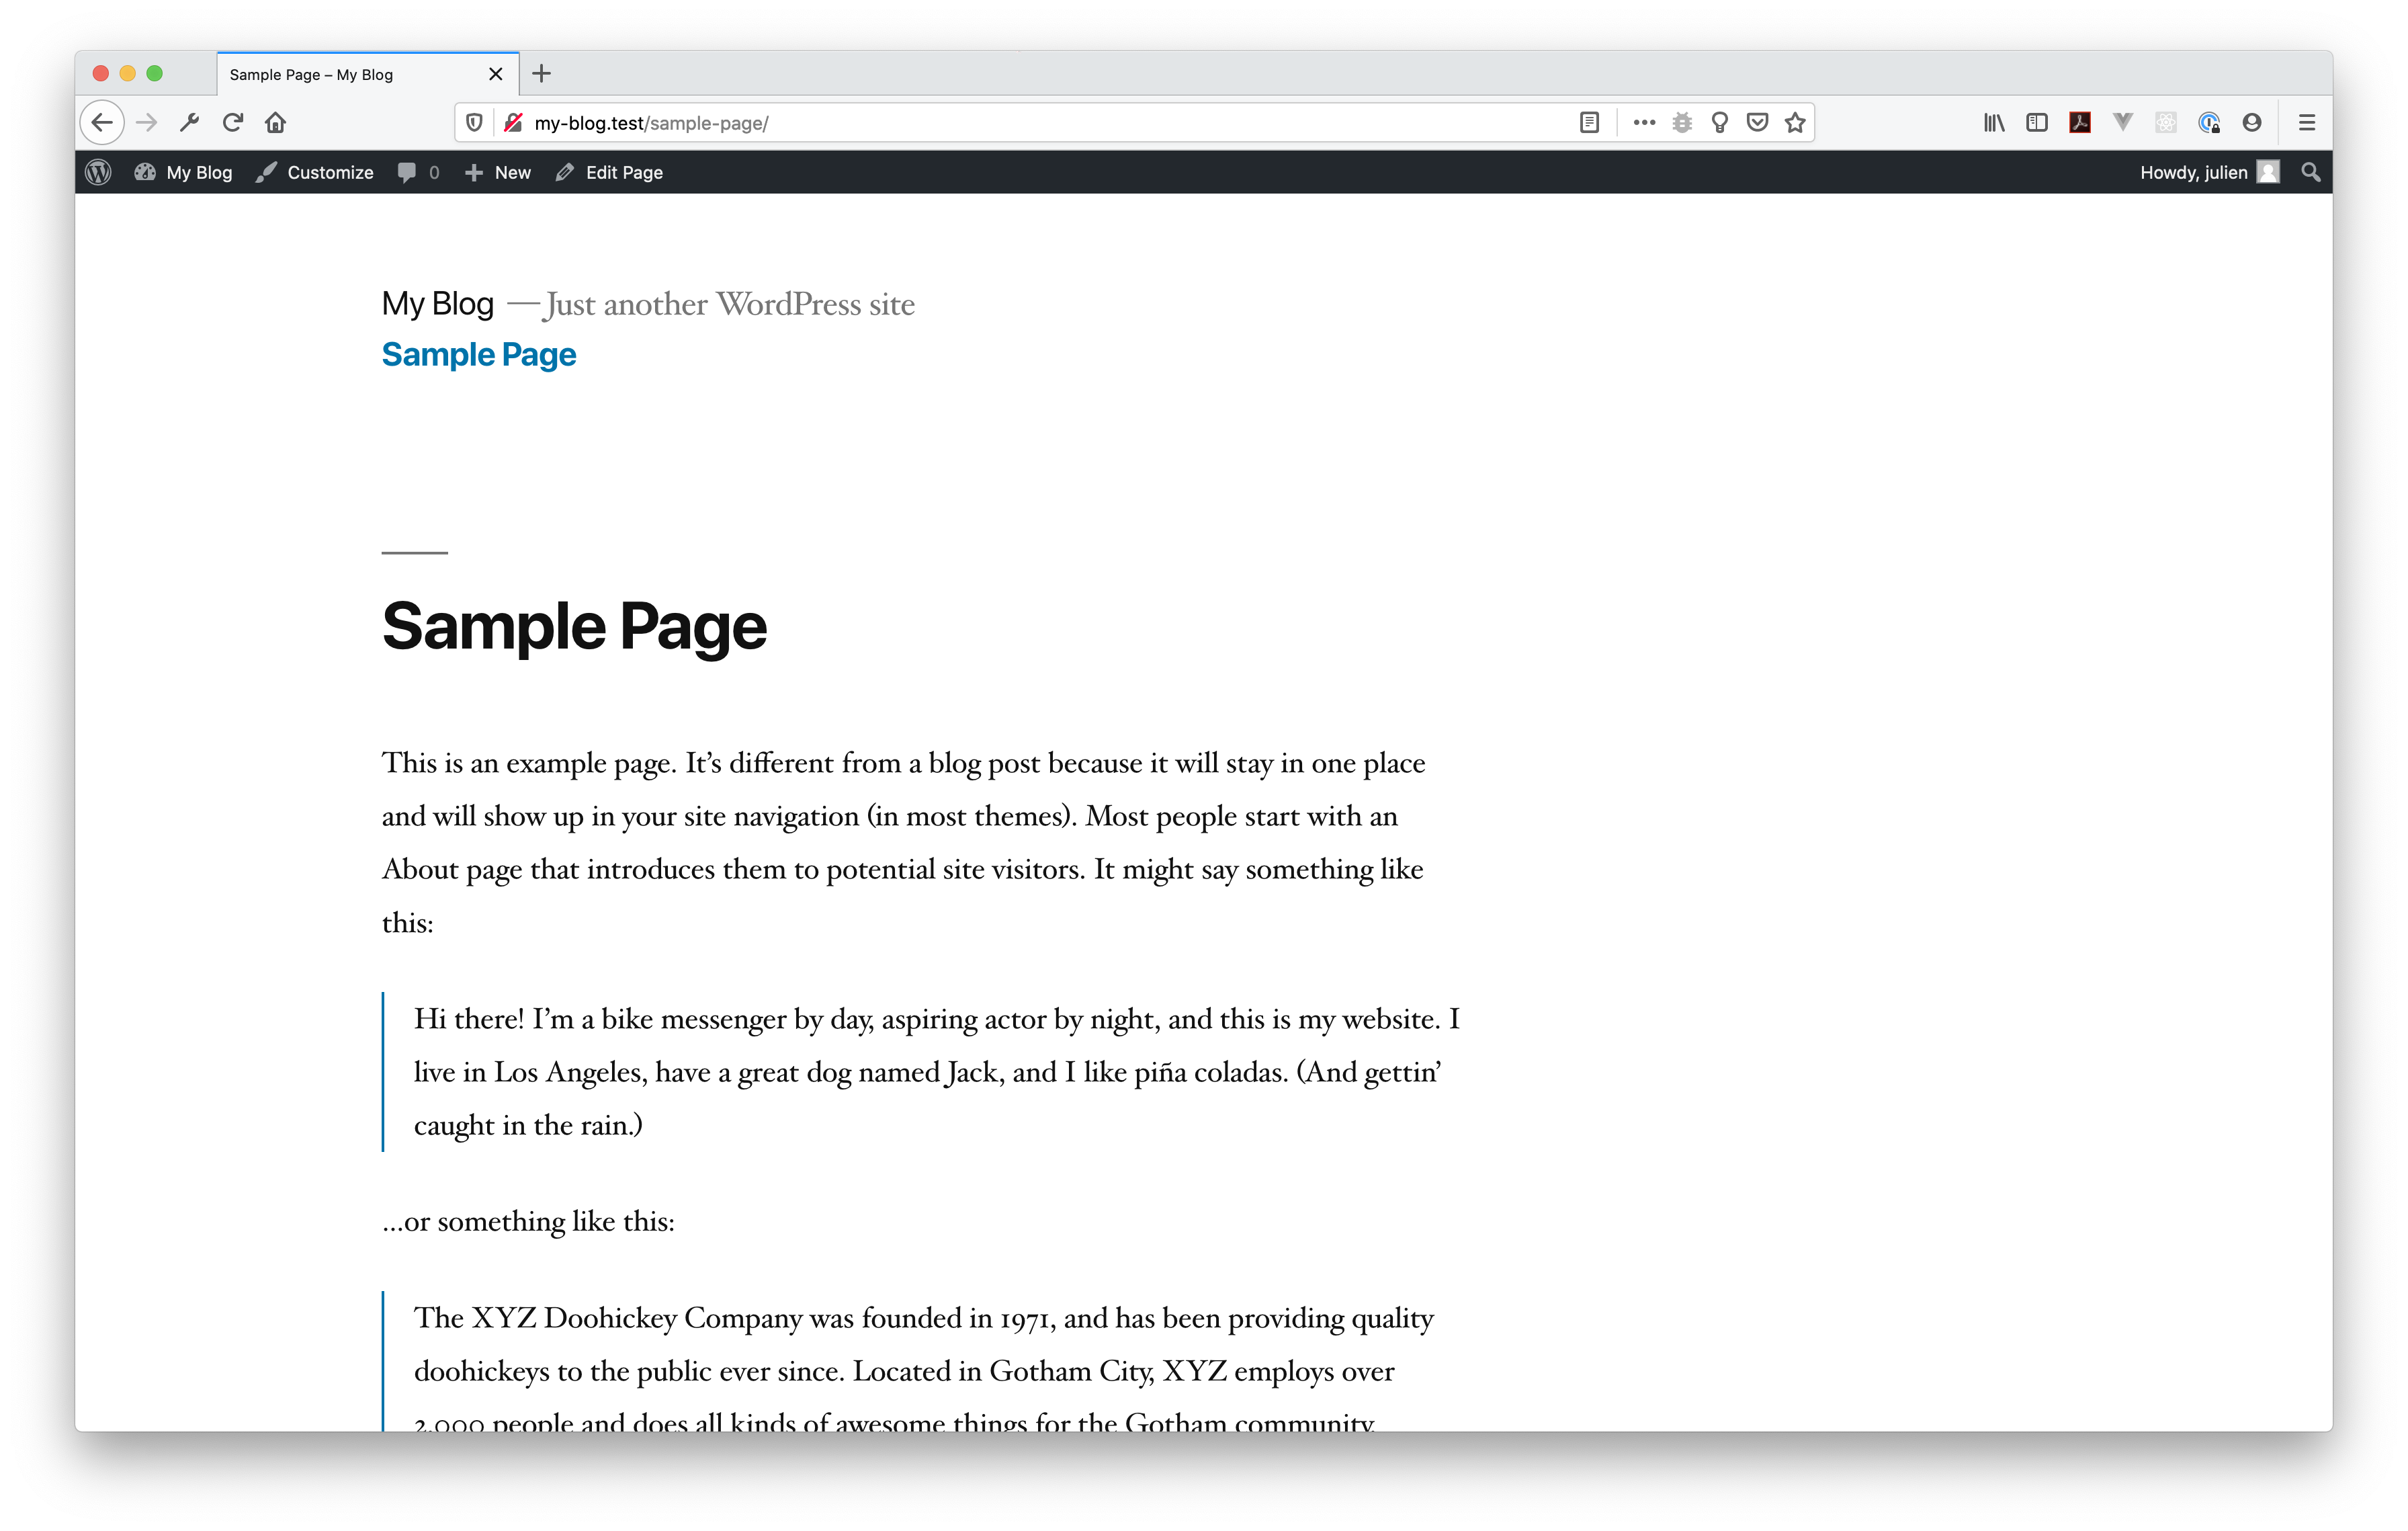
}If you visit the “Sample Page” link inside the browser, you should now be able to view its content like in the image below.
The page WordPress route is the most generic WordPress route for pages. With it, it is also possible to be more specific by passing a page ID or slug if you need to return a different layout. The framework also support page templates using the template WordPress route. I encourage you to dig into those case scenarios by looking at “Page route” documentation.
Search route
Back to our routes/web.php file, let’s define a WordPress search route in order to be able to use the default search form on our blog. Add the following route:
Route::any('search', 'SearchController@index');Then from your Terminal or Console, use the make:controller command to generate the controller class like so:
php console make:controller SearchControllerInside your code editor, open the SearchController.php file and define the public index method as defined in the route. Then simply return the search view stored inside your theme views directory.
<?php
namespace App\Http\Controllers;
use Illuminate\Http\Request;
class SearchController extends Controller
{
public function index()
{
return view('search');
}
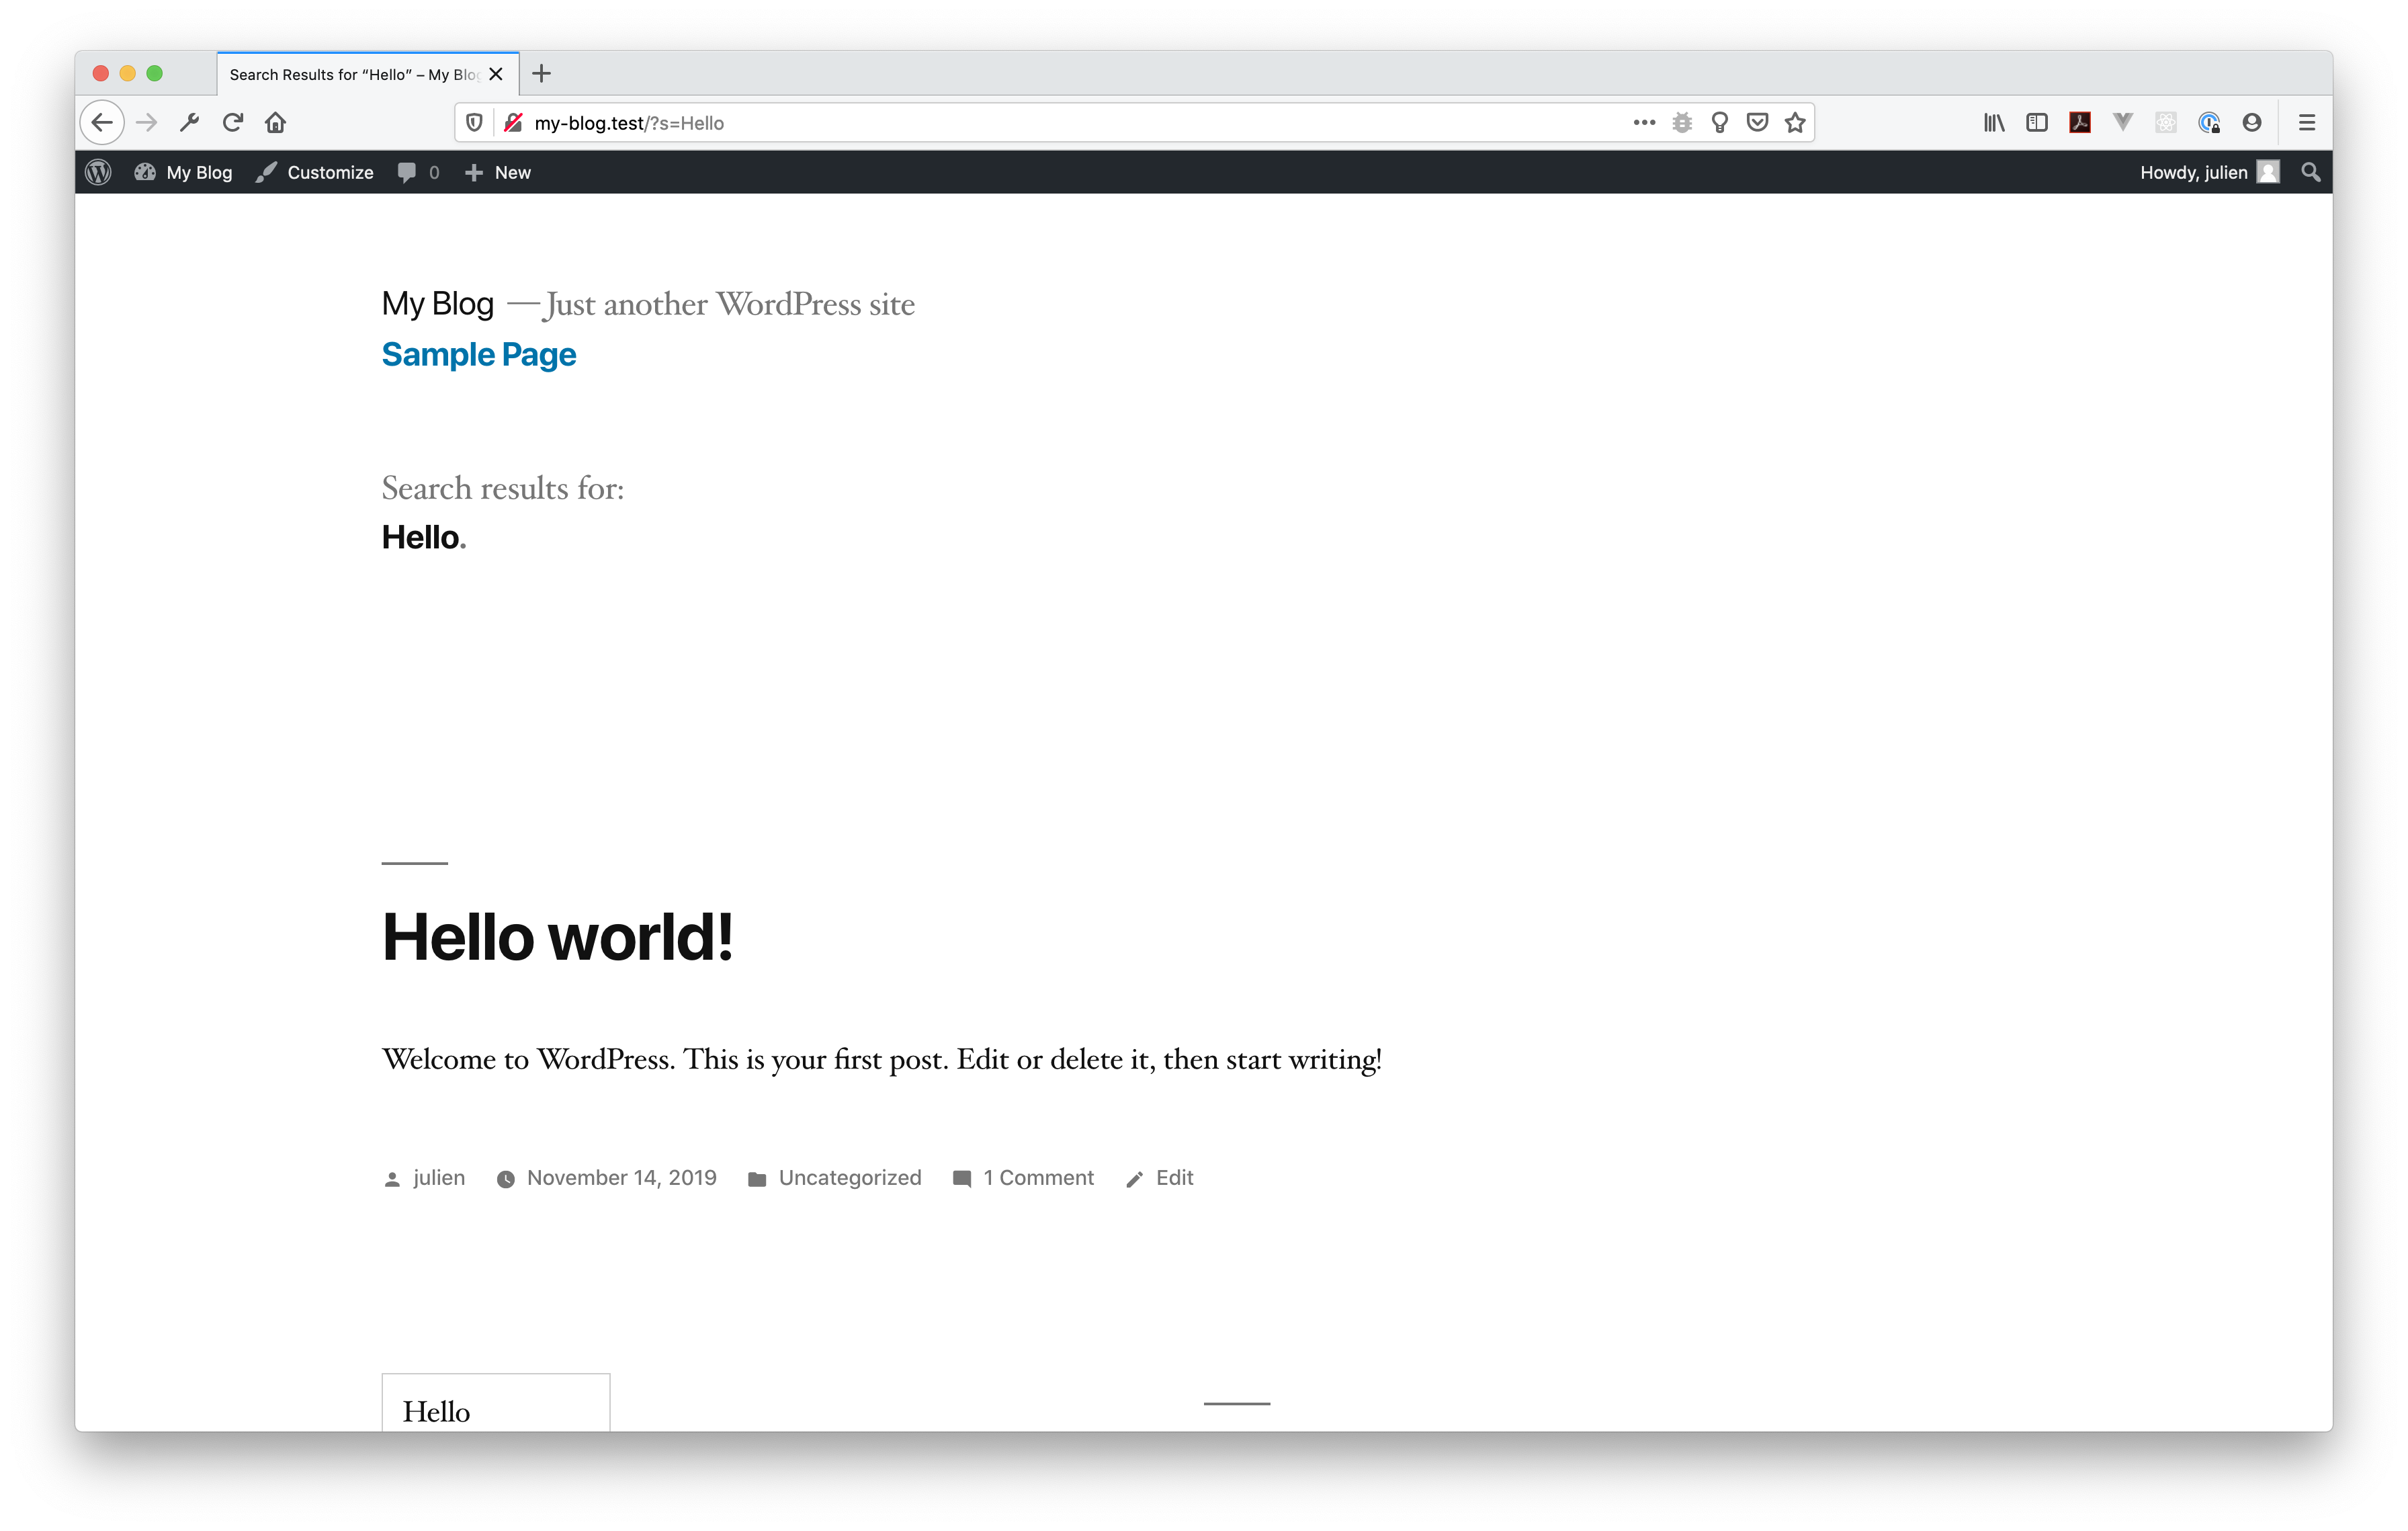
}If you now test the default search form, you can see that our blog application is correctly handling the results.
404 route
As a last route, we’re going to handle non-existing endpoints inside our blog application. In order to do so, open your routes/web.php file and add the following route:
Route::any('404', 'ExceptionController@index');Next, generate the ExceptionController class using the CLI tool:
php console make:controller ExceptionControllerOpen the ExceptionController.php file stored inside the app/Http/Controllers directory, add the public index method and return a 404.blade.php view like so:
<?php

namespace App\Http\Controllers;

use Illuminate\Http\Request;

class ExceptionController extends Controller
{
    public function index()
    {
        return view('exceptions.404');
    }
}
Visit a random URL in the browser and you should see a newly styled 404 page.
Now I could have stopped here but you should note that there is one issue with the WordPress 404 route. Behind the scene, it leverages the is_404() template function. And if WordPress does not recognizes a request based on the core elements it defines, like a post, a page, an archive, … WordPress is setting the request has not found.
This default behavior may cause some issues if you work with “classic” routes or if you have plugins that define custom endpoints/routes. Indeed, because this WordPress 404 route is a catch-all requests if not from the core, your custom routes may simply return the 404 view instead of your personnalized content.
So instead of using this default 404 WordPress route, I recommand you to use another method provided by the Routing API, which is the fallback() method.
Replace the 404 route code by this one:
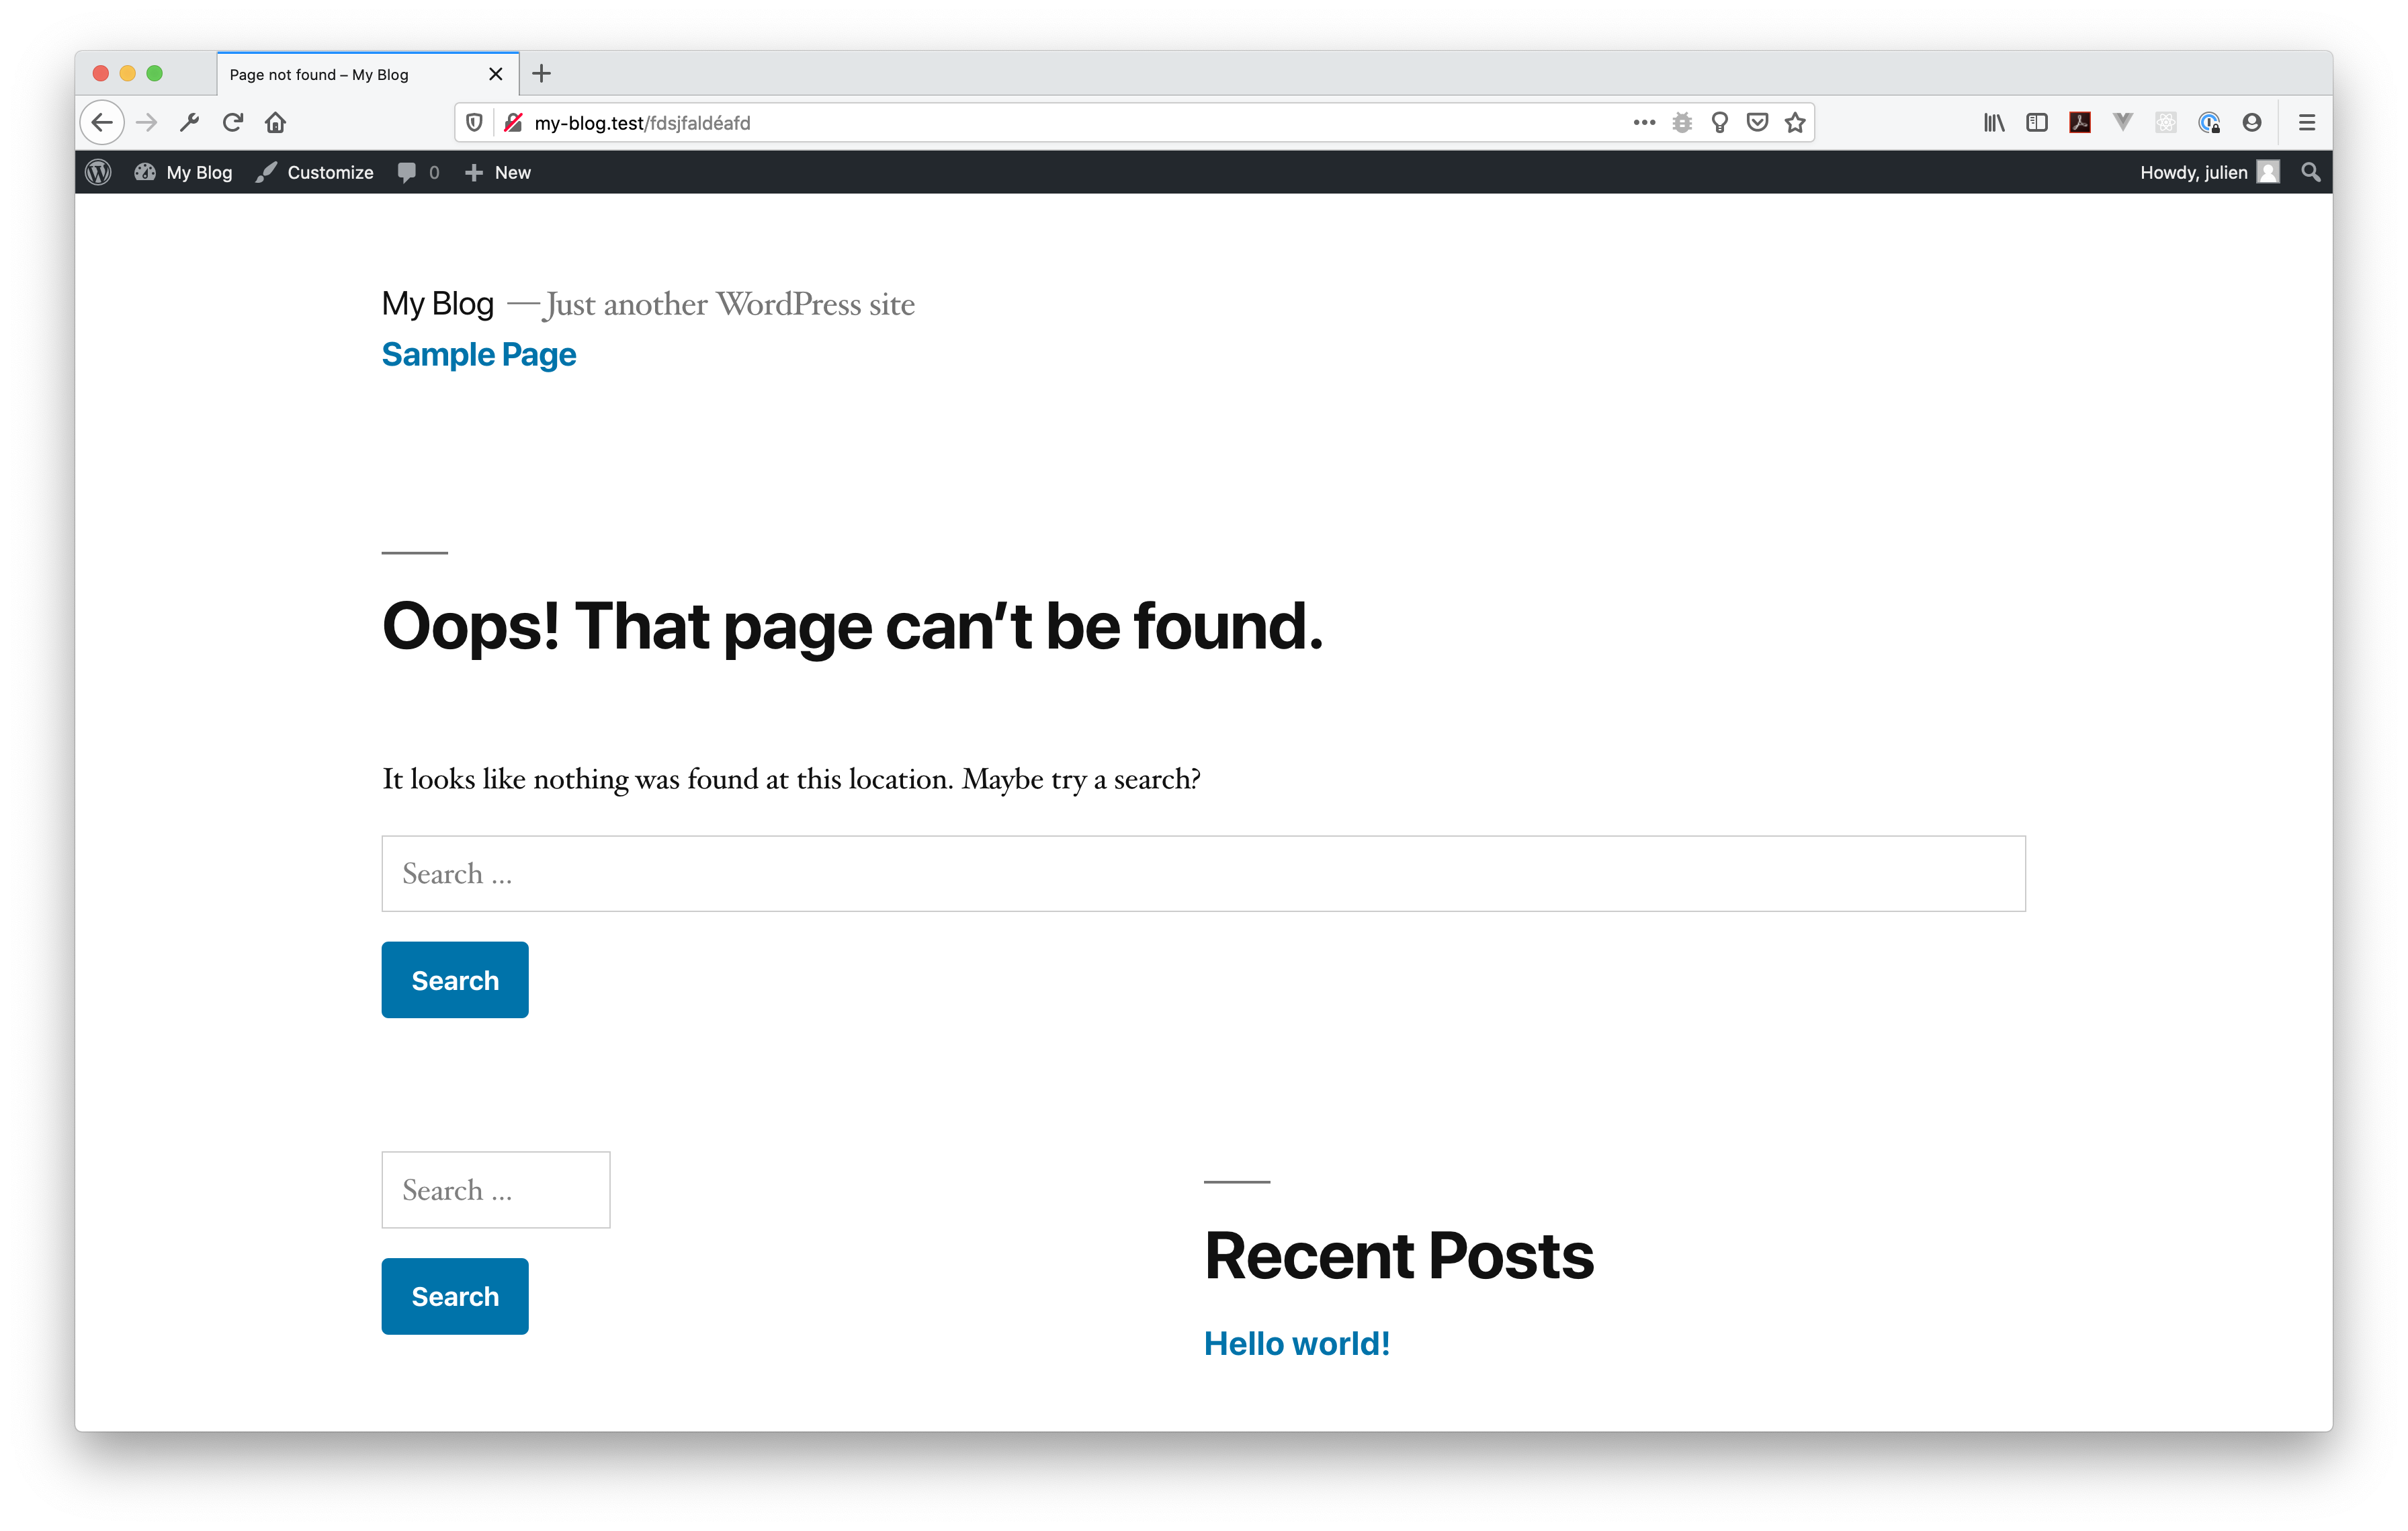
Route::fallback('ExceptionController@index');If you try again a random URL in the browser, you should still get the appropriate view diplayed like the image below.
Final words
That’s it for our “Getting started” tutorial. This is an introduction and we have covered quite a few of the groundwork. We learnt how to start a new project, how to setup a local development environment and configure our application. We learnt the basics of the Routing API, how to define custom routes (“classic”) and how to use the “WordPress” routes. We introduced Laravel Mix to handle our theme assets and see how to register them using the Asset API.
I plan to create a more “Advanced” tutorial that will dig into more APIs provided by the framework. Subscribe in our newsletter below to be notified when the course is available.
In the meantime, you can also follow us on Twitter or contribute to the project by visiting our GitHub account and dig into the source code.
For people that are seriously considering to work with the Themosis framework for their business, we also provide a professional support to help you in your projects. Visit our support platform and create an account in order to receive assistance.
Finally, I encourage you to read the extra resources below in order to get a deeper understanding of what’s possible with the Themosis framework. I hope this tutorial helped you. See you! 👋
Resources
Here is a list of references to check if you’re looking for more detailed informations on a subject:
Hi Julien !
thanks for this Getting Started tutorial. In your upcoming advanced tutorial, it would be great to have a demo on some more advanced concepts regarding the link between Laravel stuff (such as Models, Eloquent, Form validation) and WordPress (localization, custom fields, plugins).
Thanks again.
Thanks! This is indeed planned for the advanced course. I’ll cover all APIs and you’ll learn to build a bespoke web application from scratch with the Themosis framework. Stay tuned 😉